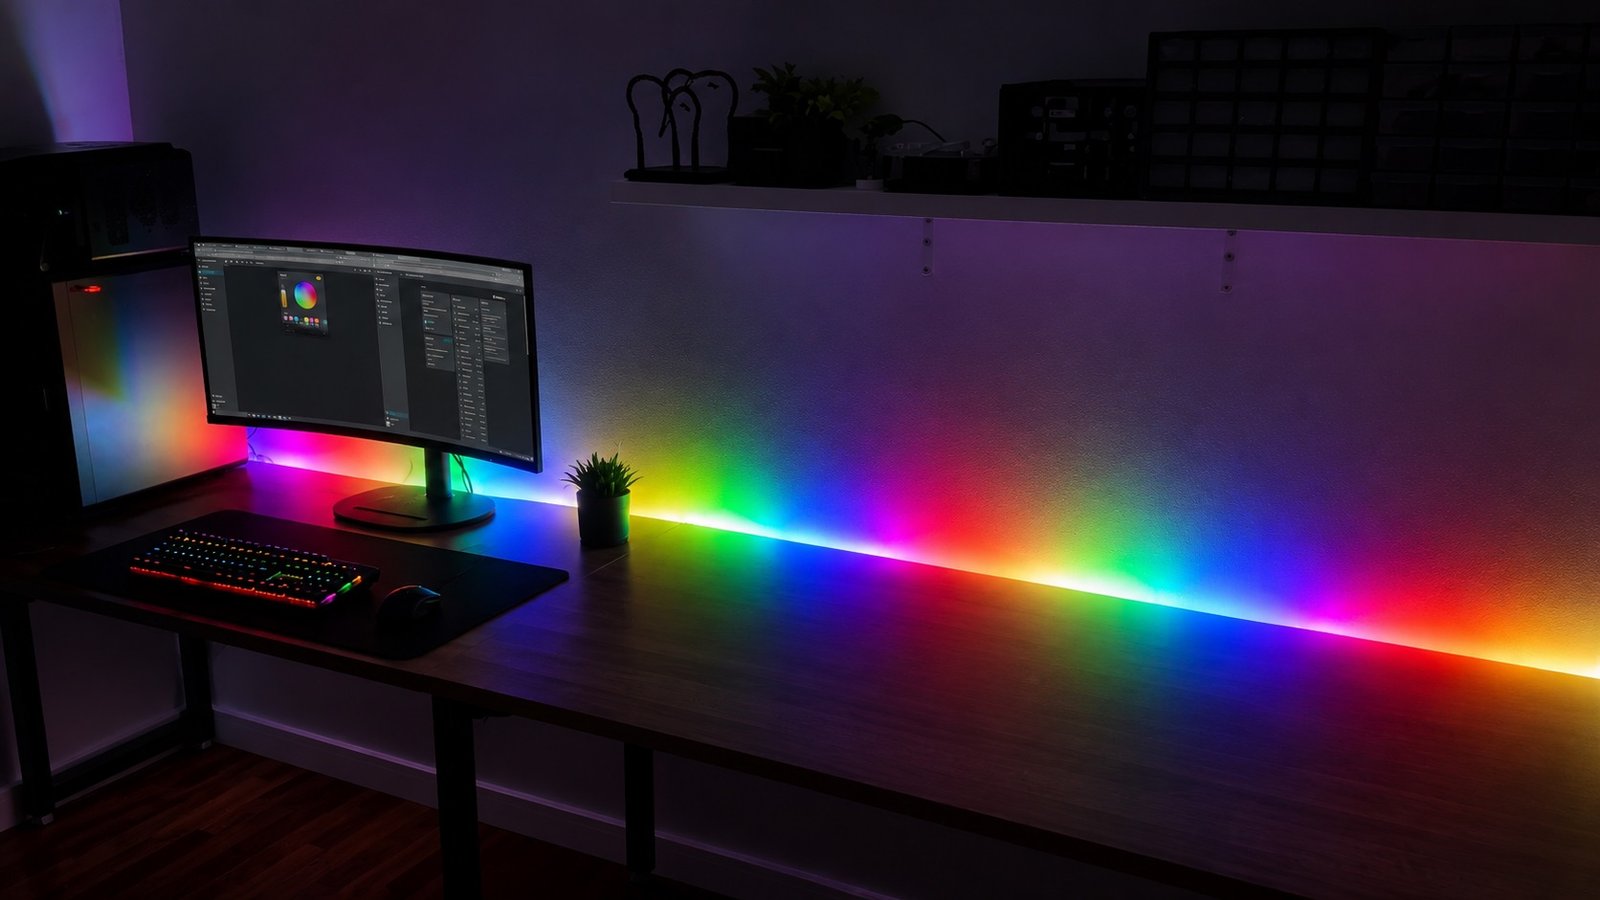
My office has always been functional, but it never really felt like a space I wanted to spend time in at night. The desk area felt dark, plain, and unfinished, so I decided to add hidden smart LED lighting behind the desk.
The goal was simple: create a soft glow on the wall, control it through Home Assistant, and have it turn on automatically when I walked into the room.
Like most DIY smart home projects, though, it ended up being a little more involved than just sticking an LED strip behind a desk.
The desk has a curved back, the LED strips are split into left and right sections, I used 5V addressable LEDs that need proper power planning, and I controlled everything with an ESP32-C6 running ESPHome.
Here’s how the project came together, what parts I used, the problems I had to solve, and what I would do differently next time.
The Goal for the Desk Lighting
I did not want this to look like a bright RGB gaming setup. I wanted something softer and more practical.
The idea was to hide the LEDs behind the desk so the light bounced onto the wall rather than shining directly into the room. This creates a much nicer effect because you see the glow, not the individual LEDs.
Most of the time, I planned to use the lights as:
- soft white lighting for normal work
- subtle blue or purple mood lighting at night
- occasional addressable effects for fun
Because my office already uses Home Assistant, I also wanted the lights to feel like part of the room rather than another separate gadget. That meant no extra remote, no random phone app, and no separate controller.
The lights needed to work with Home Assistant, support presets and scenes, and turn on automatically when I entered the office.
The Main Problems I Had to Solve
Before mounting anything, there were a few things I had to think through.
1. The Desk Has a Curved Back
The back of the desk is not perfectly straight. It has a curve through the middle, which makes rigid aluminium LED channel harder to mount neatly.
For a straight desk, aluminium channel would probably look cleaner. But for this setup, flexible silicone diffuser made more sense because it could follow the shape of the desk.
2. The LED Strips Are Split Left and Right
I was not using one continuous strip. Instead, I had one LED strip on the left side of the desk and one on the right.
Physically, they are separate strips. But visually, I wanted them to feel like one lighting setup across the back wall.
That matters most with animated effects. If the left and right strips act like two unrelated lights, the effect can look disconnected and cheap.
3. 5V Addressable LEDs Need Proper Power
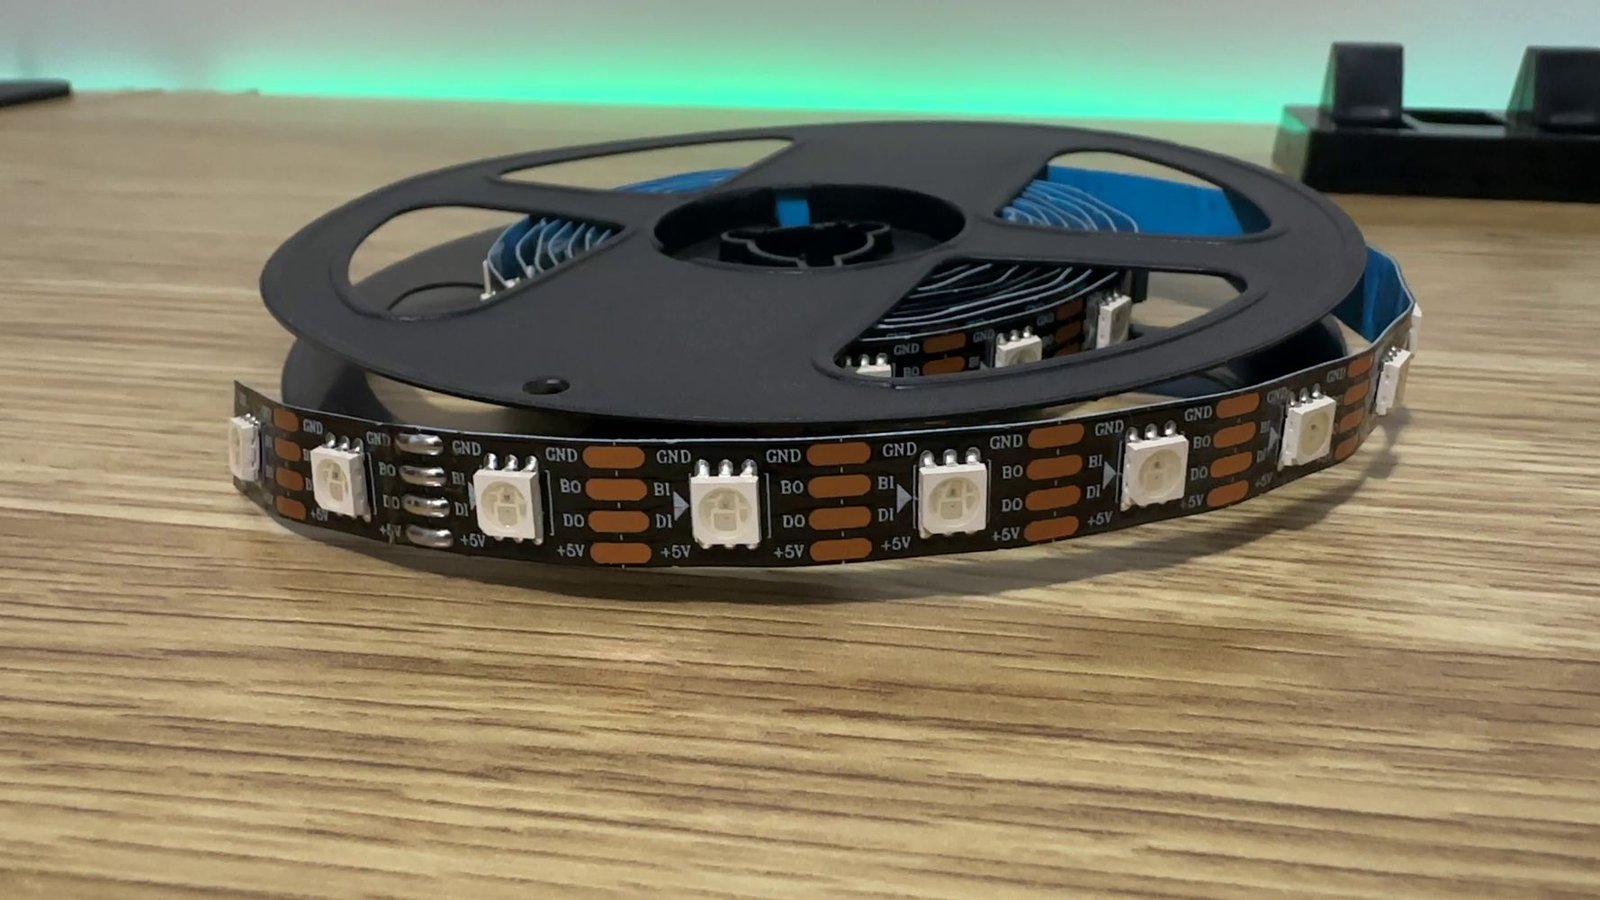
The strips I used are 5V addressable LEDs. Each side is about 1.5 metres long, with 60 LEDs per metre, which works out to around 90 LEDs per side.
A rough worst-case estimate for addressable RGB LEDs is up to about 60 milliamps per LED at full white. That means one side could theoretically pull around 5.4 amps if every LED was running full brightness white.
In normal use, I will not run them like that. But it still explains why power matters. Underpowered LED strips can flicker, dim, or behave unpredictably.
4. I Used ESPHome Instead of WLED
WLED is usually one of the first things people think of for LED strip projects, but for this setup I used an ESP32-C6, so I went with ESPHome instead.
That ended up being a good fit because the whole point of the project was Home Assistant control anyway.
Parts Used
For this project, I used:
- WS2813 5V addressable LED strip (60 LEDs per metre)
- ESP32-C6 SuperMini
- two 5V 6A plug-in power supplies
- flexible silicone LED diffuser
- 3D printed enclosure for the ESP32
- Home Assistant
- ESPHome
- an existing mmWave presence sensor
I used two separate plug-in power supplies rather than one larger open-frame switching power supply. A larger supply could power everything, but for an office setup, plug-in supplies felt cleaner and safer.
Unless you are confident working with mains voltage or you have an electrician involved, plug-in supplies are the safer option for most DIY desk lighting projects.
Testing the LED Strips Before Mounting
Before attaching anything behind the desk, I tested the LED strips on the bench.
This is not the most exciting part of the project, but it is one of the most important.
Once the diffuser is mounted, cables are hidden, and everything is cable managed, finding out that the strip is wired from the wrong end is extremely annoying.
Before mounting, I checked three things:
- power was working
- the data direction was correct
- ESPHome could control both strips properly
Addressable LED strips have a specific data direction. There are small arrows on the strip that show which way the data signal travels. If the data wire is connected to the wrong end, the strip will not behave properly.
At this stage, the setup looked messy. There were wires everywhere and nothing was mounted permanently. But that was fine. The goal was not to make it look good yet. The goal was to prove everything worked before making it harder to fix.
Wiring and Power Setup
Because each side of the desk uses around 90 LEDs, I gave each strip its own 5V 6A power supply.
The ESP32 handles the data signal for the LED strips, but there is one important detail when using separate power supplies: the grounds need to be connected together.
Even though each strip has its own power supply, the LED grounds and ESP32 ground need to share a common reference. Without a shared ground, the LEDs may flicker, glitch, or behave unpredictably.
The basic idea is:
- power supply 1 powers the left LED strip
- power supply 2 powers the right LED strip
- the ESP32 sends data to the strips
- all grounds are tied together
I also mounted the ESP32 inside a small 3D printed enclosure and attached it under the desk. That keeps the controller hidden, but still accessible if I need to reflash it or change the wiring later.
That is something worth planning for. It is easy to hide a smart home controller so well that it becomes annoying to service later.
Mounting the LED Diffuser Behind the Desk
Once the bench test was working, I started mounting the flexible diffuser behind the desk.
This is where the flexible diffuser was the right choice. Because the desk curves through the middle, the diffuser could follow the shape much more naturally than rigid aluminium channel.
I installed the LED strips into the diffuser first, then mounted the diffuser along the back edge of the desk using double-sided tape.
The main thing I cared about was hiding the actual LEDs from the front. I did not want to see the strip directly. I only wanted to see the light bouncing onto the wall.
That makes the lighting feel much softer and less distracting.
This part was not difficult, but it was fiddly. A lot of the time went into cable management, positioning the diffuser, and making sure the wiring stayed hidden.
This is also where I was glad I tested everything first. Once the diffuser was mounted and the cables were tucked away, I really did not want to pull everything apart again.
Setting Up ESPHome and Home Assistant
For the software side, I used ESPHome.
ESPHome works well for this type of project because I did not need the lights to be a separate standalone system. I wanted them to be part of Home Assistant.
Once the ESP32 was flashed and connected, the LED strips appeared in Home Assistant like normal lights. From there, I could control brightness, colour, effects, and presets.
The part that needed more tweaking was making the two separate strips feel like one lighting setup.
Because the left and right strips are physically separate, treating them as unrelated lights can make effects look disconnected. So I set the system up so I could still control each side separately if needed, but for normal use, they behave like one combined desk lighting setup.
For daily use, I added a few practical modes:
- soft white for work
- blue or purple for night lighting
- a few addressable effects for fun
The effects are nice, but the most useful part is the Home Assistant integration. Being able to include the lights in scenes, automations, and dashboard controls is what makes the project feel finished.
Creating Simple Dashboard Controls
I wanted the dashboard controls to be simple.
For everyday use, I do not want to open ESPHome or edit code. I just want to walk into the office, have the lights turn on, and quickly change the brightness or colour when needed.
On the Home Assistant dashboard, the most useful controls are:
- brightness
- colour
- effects
- favourite presets
The presets are what make the setup easy to use. Instead of manually adjusting the lights every time, I can quickly choose soft white, blue, purple, or an effect.
That is an underrated part of smart home projects. It is not enough for something to technically work. It needs to be easy enough that you actually keep using it.
Automating the Lights with an mmWave Presence Sensor
The final step was automation.
I already had an mmWave presence sensor in the office, so I used it to control the desk lighting.
The automation is simple:
- when I walk into the office, the desk lights turn on
- when the room has been empty for a while, the lights turn off
This is what makes the project feel useful instead of just decorative.
I do not need to remember to turn the lights on. I do not need to grab a remote. And I do not accidentally leave them on all night.
For an office, mmWave presence detection makes more sense than a basic motion sensor. A normal motion sensor can sometimes think the room is empty if you are sitting still at the desk. An mmWave sensor can still detect presence even when you are not moving much.
That means the lights stay on while I am working, editing, or gaming, and turn off when the room is actually empty.
The Final Result
The finished result turned out exactly how I hoped.
The soft white mode is the one I will probably use most. It gives the desk a nice glow without making the room feel too colourful or distracting.
The blue and purple modes are great at night, and the animated effects are fun to have, but they are more of a demo than something I will leave on all the time.
The part I was most interested in was whether the two separate strips would feel like one lighting setup. Once the effects were working properly across both sides, the whole setup felt much more intentional.
It no longer looked like two random LED strips stuck behind a desk. It looked like lighting that belonged in the room.
What I Would Do Differently Next Time
Overall, I am really happy with how the project turned out, but there are a few things I would do differently next time.
The biggest one is cable management.
The lights themselves were not that hard to install, but working out where every cable should go after the diffuser was already mounted was more annoying than expected.
If I did this again, I would plan the cable route earlier, before sticking anything down.
I would also spend more time testing effects on the bench, especially with a split-strip setup. When the strips are sitting in front of you, it is easy to tweak things. Once they are hidden behind the desk, every small change becomes more annoying.
The flexible diffuser was definitely the right choice for this desk because of the curved back. ESPHome also ended up being a good choice because the project was built around Home Assistant from the start.
Key Takeaways
The biggest lesson from this project is that the LEDs are usually the easy part.
The parts that matter most are:
- choosing the right mounting method
- planning the power properly
- sharing grounds correctly
- testing before mounting
- managing cables neatly
- making the controls simple
- automating the lights in a useful way
For this setup, hidden LED lighting, Home Assistant control, and mmWave automation made the office feel much better without adding another remote, another app, or another thing to think about.
It is not a massive project, but it made the room feel more finished and more enjoyable to use every day.
Disclaimer: This project is shared for educational purposes only. If you choose to build it, you do so at your own risk. Double-check wiring, follow safety guidelines, and never work on live circuits if you’re unsure.
Some of the links in this post may be affiliate links. If you buy through them, I may earn a small commission at no extra cost to you.