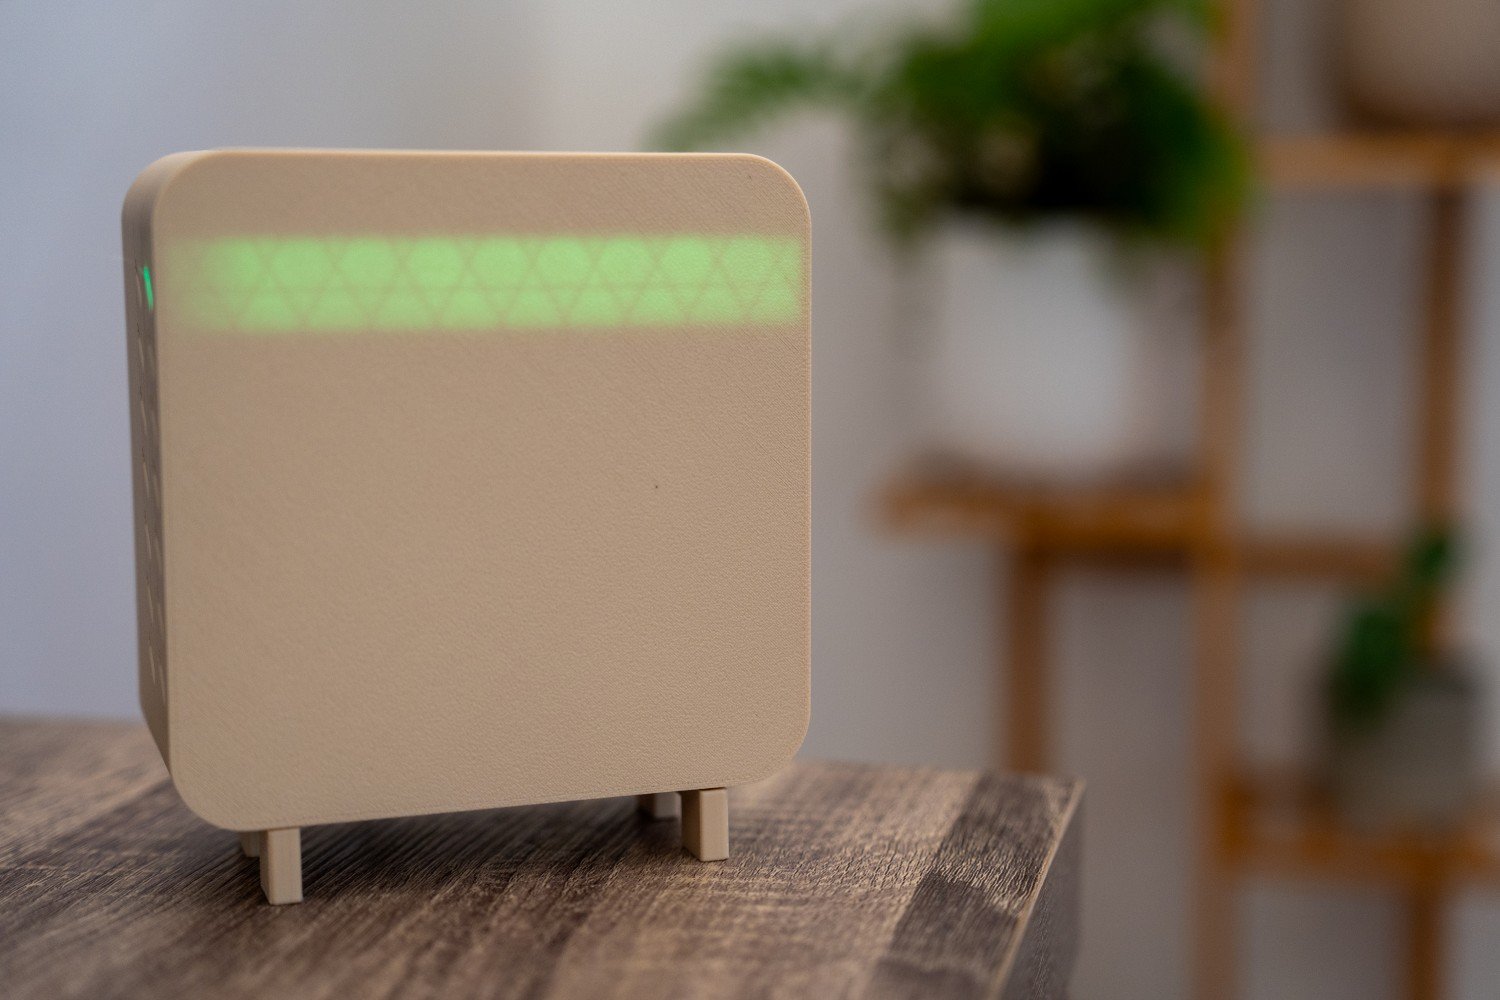
When I first started building my own LoRa sensors, I needed a simple way to get their data back into Home Assistant.
The first version of my DIY LoRa gateway did exactly that. A sensor could send a packet over LoRa, the gateway would receive it, connect to my MQTT broker over Wi-Fi and make the data available in Home Assistant.
For experimenting with LoRa and building a small private sensor network, it worked really well.
But as I started turning those experiments into proper outdoor sensors, including my LoRa water tank sensor, I wanted to improve the way the devices communicated.
The original system used a shared network name and pairing code. It was simple, but the LoRa packets themselves were still readable over the air.
The new version changes the security model rather than just adding another feature.
Each sensor now has its own device address and encryption keys, LoRa packets are encrypted and authenticated using AES-128-GCM, replayed packets are rejected, and the gateway keeps track of the security state for each individual sensor.
I also wanted the Home Assistant side to stay simple.
Once a sensor is set up and paired, the gateway handles LoRa reception, MQTT and Home Assistant Discovery automatically.
The end result is a gateway I can leave permanently running inside the house and use as the centre of my own secure LoRa sensor network.
Looking for the Simpler Version?
Before getting into this build, it is worth mentioning that I still have my original DIY LoRa gateway project available.
That version is easier to understand if you are just getting started with LoRa and want to experiment with sending sensor data into Home Assistant.
This article covers the newer version I now use for my actual sensor projects.
It adds per-device encryption, authentication and replay protection, but that also means there are a few more things to configure when adding a sensor.
If you’re building my LoRa water tank sensor, this is the gateway version designed to work with the latest sensor firmware.
What the Gateway Does
The basic architecture hasn’t changed.
LoRa Sensor
    ↓
Encrypted LoRa
    ↓
Heltec Gateway
    ↓
Wi-Fi
    ↓
MQTT
    ↓
Home Assistant
The remote sensors do not need to connect to Wi-Fi or Home Assistant themselves.
They only need to communicate with the gateway over LoRa.
The gateway stays powered inside the house, where it has a reliable Wi-Fi connection, and takes care of everything else.
In my current setup, the gateway:
- Receives LoRa packets from remote sensors
- Authenticates and decrypts each packet
- Rejects packets from unknown devices
- Rejects old or replayed packets
- Sends encrypted acknowledgements back to sensors
- Publishes sensor readings to MQTT
- Creates Home Assistant entities automatically using MQTT Discovery
- Stores known sensors in flash
- Keeps sensor security state through restarts
- Supports multiple LoRa sensors from the same gateway
- Displays gateway status on the onboard OLED
- Queues sensor data during temporary MQTT outages
The gateway itself doesn’t need to know specifically how a water tank sensor, temperature sensor or some future sensor works.
Once a valid sensor sends its data, the gateway can turn those fields into Home Assistant entities automatically.
This Is LoRa, Not LoRaWAN
Just like my original gateway, this project uses LoRa without LoRaWAN.
LoRa is the radio technology being used to transmit the packets.
LoRaWAN is a much larger networking protocol built around LoRa and normally includes gateways, network servers, device provisioning and other infrastructure.
I don’t need that for what I’m trying to do.
My sensors are only communicating around my own property with one gateway, so I have built a much smaller private protocol on top of LoRa.
There is no external LoRaWAN network, LoRaWAN account or network server involved.
The sensors communicate directly with my gateway.
Hardware I’m Using
The gateway hardware is intentionally pretty simple.
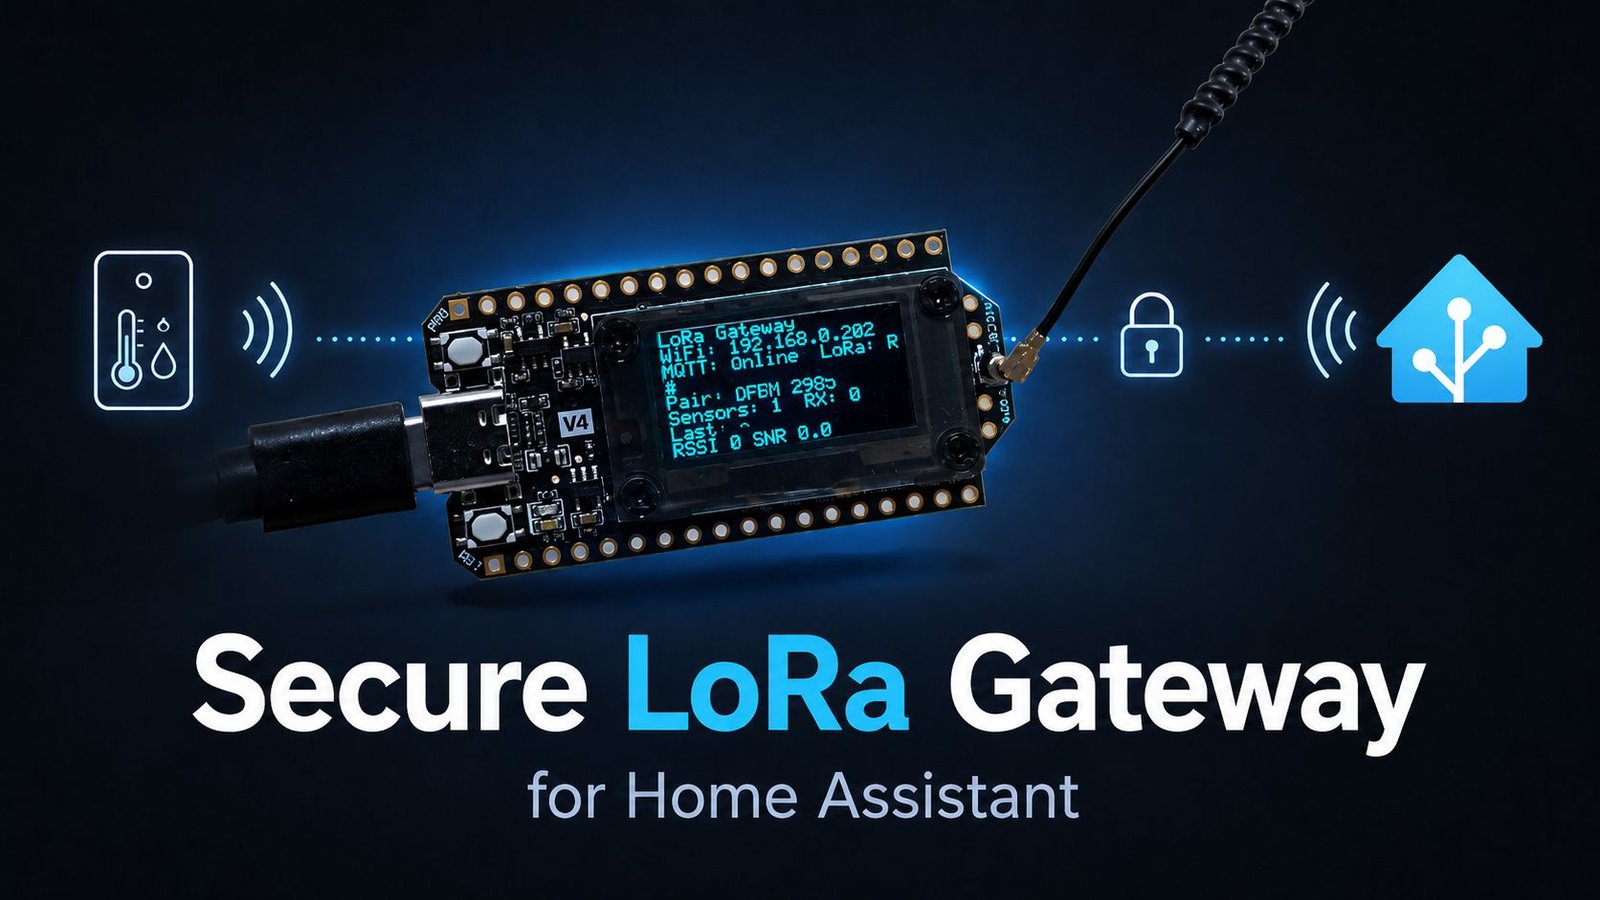
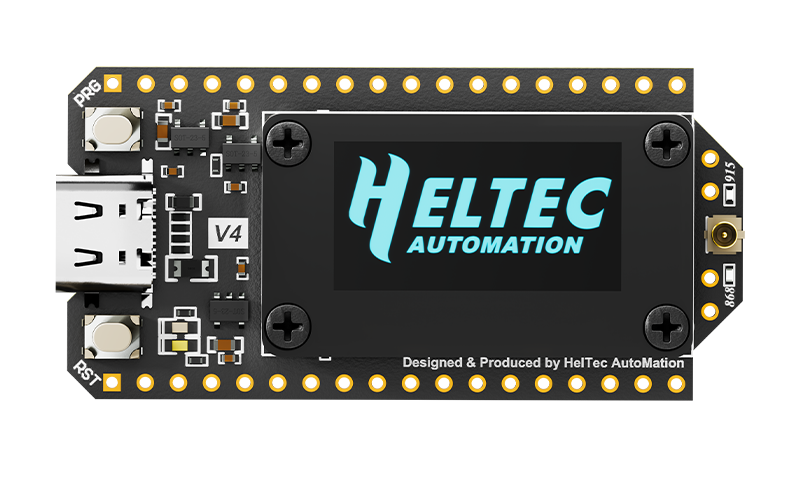
The main component is a Heltec WiFi LoRa 32 V4.3, which combines the ESP32-S3, SX1262 LoRa radio and an OLED display on one board.
For the gateway itself, that means there isn’t much additional hardware required.
| Component | What I’m Using It For |
|---|---|
| Heltec WiFi LoRa 32 V4.3 | Main gateway controller |
| LoRa antenna | Communication with remote sensors |
| USB-C power supply | Permanent gateway power |
| Wi-Fi network | Connection to MQTT and Home Assistant |
| MQTT broker | Transfers gateway data into Home Assistant |
Unlike my battery-powered sensors, power consumption isn’t particularly important here.
The gateway needs to remain awake and listening for LoRa packets, so I simply power it continuously over USB.
Heltec V4
I used the Heltec V4 because it combines the ESP32-S3 and SX1262 LoRa radio on one board, which keeps the overall sensor build relatively compact.
Why I Changed the Security
My original LoRa gateway was deliberately simple.
Sensors had a network identifier and a shared pairing code. When pairing mode was open, a sensor with the correct details could be added to the gateway.
That is perfectly useful for experimenting with LoRa, but once I started using the network for permanent sensors I wanted something better.
The main problem was that the application data was being transmitted as normal readable packets.
For a water tank level this might not sound particularly sensitive, but I would rather build the communication layer properly now than redesign every sensor later.
I also want this gateway to eventually support more than just one water tank sensor.
How the updated LoRa protocol works
The data inside each LoRa packet is now protected using AES-128-GCM authenticated encryption.
That gives me two important things.
Encryption
Someone receiving the LoRa transmission cannot simply read the sensor data without the correct key.
Authentication
The gateway can verify that the packet was created by a device with the correct key and that the packet hasn’t been modified in transit.
Each sensor has its own:
- Sensor ID
- 32-bit device address
- Uplink AES key
- Downlink AES key
The uplink key protects packets travelling:
Sensor → GatewayThe downlink key protects packets travelling:
Gateway → SensorI deliberately use separate keys for each direction.
I also give every sensor its own keys rather than sharing one master key across the whole LoRa network.
That means adding another sensor doesn’t mean giving every device the same security credentials.
Replay Protection
Encrypting the packet was only part of what I wanted to solve.
Imagine someone recorded a legitimate LoRa transmission and retransmitted the exact same packet later.
The encryption would still be valid because it was originally created by a real sensor.
To deal with that, the updated protocol also uses a session ID and packet counter.
The gateway remembers the security state for each device.
If an older packet is transmitted again, the gateway can recognise that its counter has already been used and reject it.
The sensor and gateway also reserve counters in flash in a way that avoids simply restarting at zero after a reboot.
For a small DIY sensor network this is probably more security than a water tank reading strictly requires, but I wanted the underlying protocol to be something I could keep using as I build more sensors.
The Secure Device Registry
New devices now need to be authorised in advance.
The gateway has a file called:
SecureDeviceRegistry.h
This contains the sensors that are allowed to communicate with it.
A simplified entry looks like this:
{
    "tank_01",
    0x12345678UL,
    {
        // 16-byte uplink AES key
    },
    {
        // 16-byte downlink AES key
    },
},The corresponding sensor contains the exact same device address and keys in:
SecureSensorSecrets.h
This is important because pairing does not send the encryption keys over LoRa.
The gateway already knows the sensor’s address and keys before pairing happens.
When the gateway receives the encrypted pairing request, it can authenticate the sensor using those preconfigured credentials.
Only then can the sensor be accepted.
How Pairing Works
I still wanted adding a sensor to require physical access to the gateway.
Just knowing the correct encryption keys isn’t enough to silently add a new sensor whenever someone wants.
The normal process is:
Add sensor credentials to gateway
        ↓
Upload gateway firmware
        ↓
Power or reset sensor
        ↓
Press BOOT on gateway
        ↓
Pairing window opens
        ↓
Sensor sends encrypted pairing request
        ↓
Gateway authenticates sensor
        ↓
Sensor is saved
        ↓
Encrypted PAIR_ACK returned
Once pairing succeeds, the gateway closes the pairing window automatically.
The paired sensor is then stored in flash and doesn’t need to repeat this process every time the gateway restarts.
This gives me a useful combination.
The encryption credentials identify and authenticate the sensor, while pressing the physical BOOT button controls when a new device is actually allowed to join.
Downloading the Gateway Code
The complete Secure LoRa gateway project is available below.
Download Secure LoRa Gateway Code
The project is set up for VS Code and PlatformIO.
The download contains:
J-Rat_LoRa_Gateway/
├── platformio.ini
├── README.md
├── boards/
├── variants/
├── include/
│   ├── config.h
│   ├── SecureDeviceRegistry.h
│   └── SecureLoRaV3.h
└── src/
    └── main.cpp
I have included the required Heltec board and variant files inside the project so you don’t need to manually add them to your global PlatformIO installation.
The README also contains the setup instructions and examples for adding additional sensors.
Software You’ll Need
To upload the gateway firmware, I use:
- Visual Studio Code
- PlatformIO IDE extension
Download the gateway ZIP and extract it somewhere on your computer.
Then open the entire gateway folder in VS Code.
PlatformIO should detect the platformio.ini file and install the required libraries automatically.
The project uses libraries for:
- RadioLib
- MQTT
- ArduinoJson
- Adafruit SSD1306
- Adafruit GFX
Configuring Wi-Fi and MQTT
Most of the settings you’ll need are inside:
include/config.h
First, enter your Wi-Fi details:
#define WIFI_SSID       "YOUR_WIFI_NAME"
#define WIFI_PASSWORD "YOUR_WIFI_PASSWORD"Then configure your MQTT broker:
#define MQTT_HOST       "192.168.1.100"
#define MQTT_PORT       1883
#define MQTT_USER       "mqtt_username"
#define MQTT_PASSWORD "mqtt_password"If your MQTT broker does not require a username and password, the username can be left empty.
The default MQTT base topic is:
#define MQTT_BASE_TOPIC "home/lora_gateway"The gateway adds its own unique gateway ID to this by default, which also means I can run more than one gateway without their MQTT topics colliding.
Setting the Network ID
There is also a:
#define NETWORK_ID "My_LoRa_Network"This needs to be the same on the gateway and every sensor using it.
The network ID is useful for separating unrelated LoRa networks, but it isn’t the security mechanism.
The AES keys are what authenticate and encrypt each device’s traffic.
LoRa Settings
The gateway and sensor also need matching LoRa radio settings.
My current configuration uses:
#define LORA_FREQ_MHZ       915.0
#define LORA_BW_KHZ         125.0
#define LORA_SF             8
#define LORA_CR             5
#define LORA_SYNC_WORD      0x12
#define LORA_PREAMBLE_LEN 8I am using the 915 MHz band here in Australia.
If you’re building this in another country, make sure you use the LoRa frequency and transmit settings permitted in your region.
If you’re replicating my project, I would leave the bandwidth, spreading factor, coding rate and sync word alone initially.
Get the gateway and sensor communicating first before experimenting with the radio settings.
Setting Up Your First Sensor
To make the project easier to test, the downloadable gateway and tank sensor code contain matching starter credentials for tank_01.
That means the supplied gateway already has a registry entry matching the supplied tank sensor firmware.
You can therefore get the system working before worrying about generating your own keys.
Those credentials are included in a public download, so they obviously are not private.
I recommend using the included credentials for initial testing and then generating your own device address and keys before permanently deploying the sensor.
The README included with the gateway explains how to do this.
Generating New Sensor Keys
Every additional sensor should have:
- A unique sensor ID
- A unique device address
- A unique uplink key
- A unique downlink key
One easy way to generate random values is with Python.
The downloadable README includes a command that generates a random address and two 128-bit keys.
Once generated, the values are entered into the sensor’s:
SecureSensorSecrets.h
and the matching values are added to:
SecureDeviceRegistry.h
on the gateway.
For example, the registry might eventually contain:
constexpr SecureDeviceRecord SECURE_DEVICE_REGISTRY[] = {
    {
        "tank_01",
        // tank_01 address
        // tank_01 uplink key
        // tank_01 downlink key
    },
    {
        "tank_02",
        // tank_02 address
        // tank_02 uplink key
        // tank_02 downlink key
    },
};Each sensor needs its own credentials.
Do not copy the same key pair across every device.
Uploading the Gateway
Once config.h and the secure device registry are ready, connect the Heltec gateway to your computer.
Build and upload the project from PlatformIO.
Serial Monitor runs at:
115200 baudDuring startup you should see information including:
- Gateway ID
- Number of known sensors
- MQTT base topic
- MQTT server
- Network ID
- Secure downlink session
- LoRa frequency
The gateway will then connect to Wi-Fi and MQTT while continuously listening for LoRa packets.
Using the OLED
I wanted the gateway to provide enough information that I don’t need Serial Monitor connected once it is installed.
The onboard OLED shows information including:
- Wi-Fi connection
- MQTT connection
- Pairing status
- Number of known sensors
- Received packet count
- Last sensor received
- RSSI
- SNR
The OLED turns itself off after a period of inactivity.
If the screen is asleep, the first short press of BOOT wakes it.
A second press can then open pairing mode.
BOOT Button Behaviour
The BOOT button also acts as the gateway’s physical maintenance control.
Short Press
With the display awake, a short press toggles pairing mode.
Pairing stays open for up to five minutes unless a sensor pairs successfully first.
Clearing Sensors
I didn’t want one accidental long press to erase the gateway’s sensor list.
Clearing sensors now requires a confirmation sequence.
Hold BOOT for around 10 seconds to arm the clear operation.
The OLED will tell you that clearing has been armed.
Then repeat the long hold during the confirmation window to actually clear the known sensor list.
This is more deliberate than the behaviour in my original gateway.
Getting the Data Into Home Assistant
Once an authenticated sensor packet has been received, the gateway publishes the readings to MQTT.
It also uses Home Assistant MQTT Discovery, so I don’t need to manually create YAML sensor definitions for each reading.
For my water tank sensor, the gateway can automatically create entities such as:
- Tank level
- Water depth
- Derived pressure
- Pressure sensor voltage
- Battery voltage
- RSSI
- SNR
- Last seen
- Sensor fault information
What I particularly like about this approach is that these fields are not all hard-coded specifically for the water tank.
The gateway looks at the data being sent by each sensor and tracks the fields it sees.
That means if I later build another LoRa sensor that reports temperature, humidity or some other value, the same gateway architecture can handle it.
Home Assistant just sees normal MQTT entities.
What Happens if MQTT Goes Offline?
This is another part of the gateway I have improved since the original version.
Receiving the LoRa packet and publishing it to MQTT are two different things.
I don’t want a temporary MQTT outage to mean the sensor has to remain awake repeatedly retransmitting data.
The gateway therefore has a small durable job queue stored in flash.
If MQTT is temporarily unavailable, the latest accepted state for a sensor can be queued and published once the connection returns.
For sensor readings, I intentionally keep the latest value per sensor rather than trying to store a long history of every reading.
For this sensor data, I only need the newest state in Home Assistant, and this avoids filling the ESP32’s storage during a long broker outage.
Acknowledgements
My sensors don’t just transmit a reading and hope it arrived.
After sending a packet, the sensor waits for an encrypted acknowledgement from the gateway.
The acknowledgement includes information such as whether the packet was accepted and how long the sensor should wait before its next reading.
For my tank sensor, the normal reporting interval is around 30 minutes.
If the sensor doesn’t receive an acknowledgement, it can retry instead of assuming everything worked.
I also add a small random delay to sensor timing so multiple sensors don’t all wake and transmit at exactly the same instant.
That will become increasingly useful as I add more devices to the network.
Supporting Multiple Sensors
The gateway currently supports multiple sensors at the same time.
For example, I could eventually have:
tank_01
tank_02
weather_01
soil_01
They can all use the same physical gateway.
Each device has its own sensor ID, address and encryption keys.
The gateway receives the address in the secure frame, finds the matching authorised device and uses that device’s key to authenticate the packet.
After the payload has been decrypted, the sensor ID and data can be processed normally.
This means one compromised or exposed sensor key doesn’t require every sensor on the network to share that same key.
RSSI and SNR
The gateway also records RSSI and SNR for each received packet.
These are useful when positioning sensors and antennas.
RSSI gives an indication of the received signal strength.
SNR compares the LoRa signal with the surrounding noise.
One of the reasons LoRa works so well for this kind of application is that it can continue communicating with signals far weaker than you would normally expect from something like Wi-Fi.
For my sensors, I care much more about reliable delivery of a tiny reading every 30 minutes than high data throughput.
That is exactly where LoRa makes sense.
Troubleshooting
The Gateway Won’t Build
Make sure you extracted the entire gateway ZIP and opened the project folder rather than just main.cpp.
The boards, variants, include and src folders are all part of the project.
Wi-Fi Won’t Connect
Double-check the SSID and password inside config.h.
Serial Monitor will show the connection attempts and assigned IP address.
MQTT Won’t Connect
Check:
- MQTT broker IP
- MQTT port
- MQTT username
- MQTT password
- Network connectivity between the gateway and broker
Serial Monitor will display the MQTT connection state if the broker rejects the connection.
Sensor Shows as an Unknown Secure Device
The device address in the sensor doesn’t exist in the gateway’s SecureDeviceRegistry.h.
Check that the sensor has been added to the registry and upload the updated gateway firmware.
Authentication Fails
The device address may be correct, but one or both AES keys do not match.
The sensor’s SecureSensorSecrets.h and gateway’s SecureDeviceRegistry.h must contain identical credentials for that sensor.
Wrong Secure Network
The NETWORK_ID doesn’t match between the sensor and gateway.
Pairing Required
Press BOOT on the gateway to open pairing mode and allow the sensor to retry.
The Sensor Was Reprogrammed and Won’t Re-Pair
The gateway stores security session and replay information.
If a sensor has been completely reprovisioned, its old security state may need to be reset before it can establish a new session.
The README contains more information about resetting an individual sensor’s security state.
Home Assistant Entities Aren’t Appearing
Check that:
- The gateway is connected to Wi-Fi
- MQTT is connected
- The MQTT integration is configured in Home Assistant
- The sensor has successfully paired
- The gateway is receiving authenticated data packets
Home Assistant entities are created after the gateway begins receiving valid data from the sensor.
Is the Secure Version Worth the Extra Setup?
For a simple experiment on the bench, probably not.
That’s why I’m keeping my original gateway project available.
The basic version is a much easier place to start if you simply want to learn how a LoRa sensor can communicate with an ESP32 gateway and send data into Home Assistant.
But for the sensors I actually want to install around my property and leave running permanently, I prefer this version.
Once the initial device address and keys are configured, the extra security doesn’t really affect normal use.
The sensor wakes up, takes its measurement, sends an encrypted packet and goes back to sleep.
The gateway receives it, authenticates it, publishes the data and sends an acknowledgement.
Home Assistant still just gets normal sensor entities.
Most of the additional complexity stays underneath that process.
Final Thoughts
This gateway has changed quite a bit since the first version I built.
Originally, my goal was simply to prove that I could get data from a remote LoRa sensor into Home Assistant without using LoRaWAN.
That worked, but building the water tank sensor made me think more seriously about what I wanted the network to look like long term.
I didn’t want every sensor sharing the same key.
I didn’t want plaintext sensor traffic.
I didn’t want replayed packets being accepted.
And I didn’t want every new project to require another completely separate gateway.
The updated protocol gives me a foundation I can keep building on.
The gateway stays permanently powered inside the house and handles the complicated parts: LoRa reception, authentication, acknowledgements, Wi-Fi, MQTT and Home Assistant Discovery.
The remote sensors can concentrate on what they’re supposed to do.
Wake up, take a measurement, send it and go back to sleep.
For my water tank project that means I can have a battery-powered sensor sitting well outside normal Wi-Fi range while still getting reliable readings into Home Assistant every half hour.
And as I build more LoRa sensors, they can all use the same gateway without giving every device the same security credentials.
That is the setup I wanted from this project: my own small, private LoRa sensor network that works cleanly with Home Assistant without needing LoRaWAN or an external service.
This project is shared for educational purposes only. If you choose to build it, you do so at your own risk. Make sure you comply with the radio frequency and transmit-power requirements that apply in your country.
Some of the links in this post may be affiliate links. If you buy through them, I may earn a small commission at no extra cost to you.