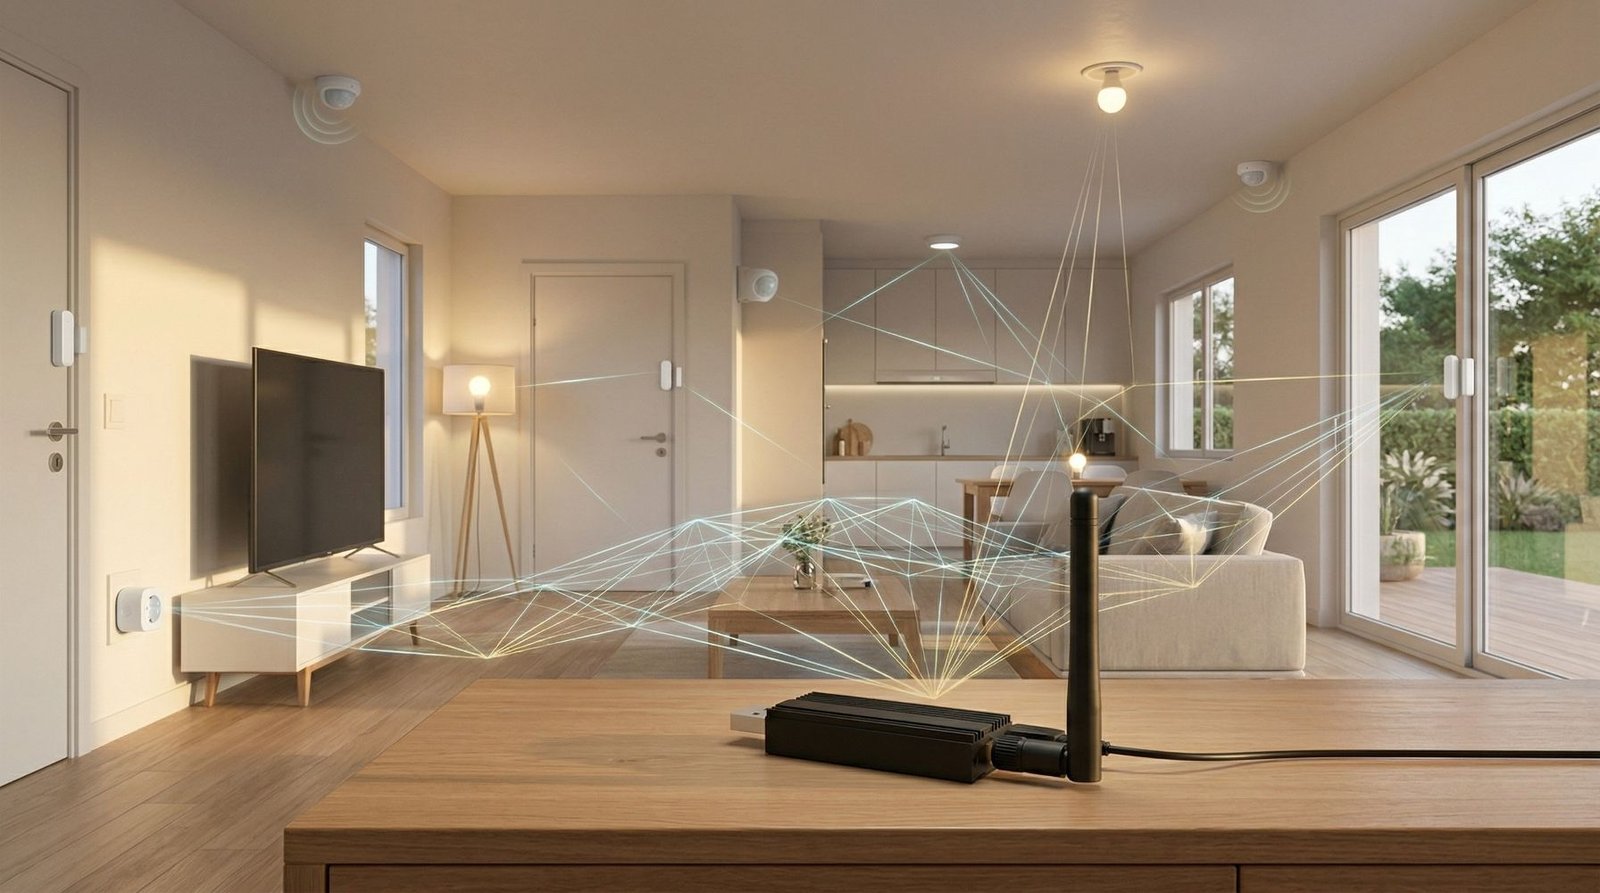
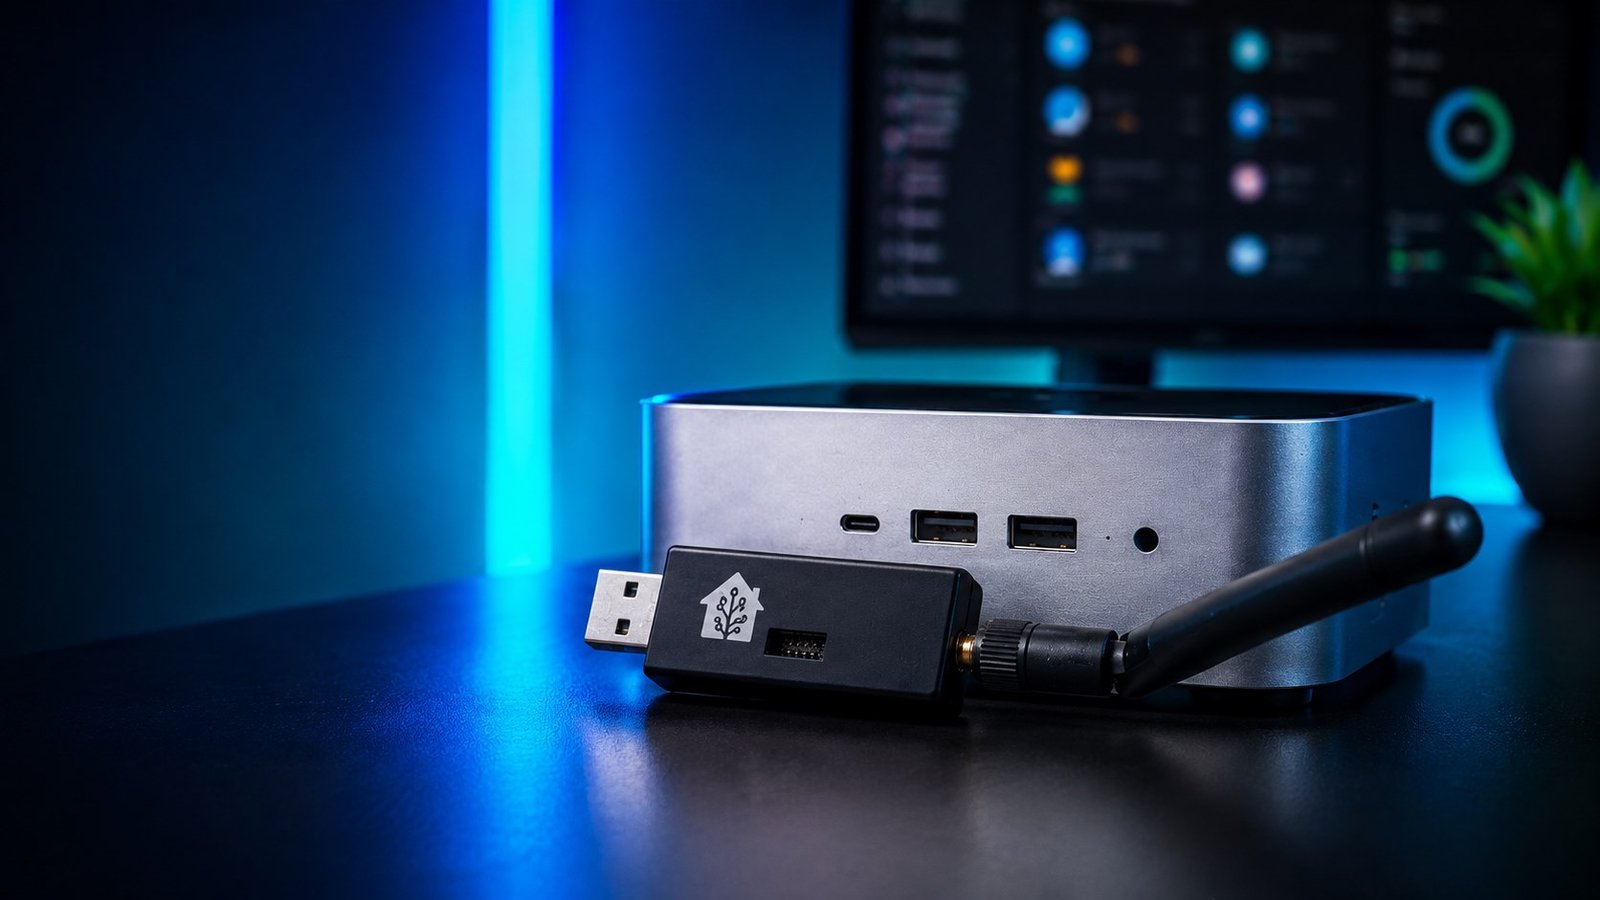
On Home Assistant OS, the setup comes down to four things: connect the coordinator, use its stable serial path, configure MQTT and Zigbee2MQTT, then pair a test device.
A Zigbee coordinator is the USB adapter that creates the Zigbee network and lets Home Assistant communicate with Zigbee sensors, plugs, switches, lights, and other devices. If you have not chosen one yet, my Zigbee dongle guide covers the main options.
The setup below uses Zigbee2MQTT with the Mosquitto MQTT broker rather than ZHA.
This setup uses:
- Home Assistant OS
- Mosquitto broker
- Zigbee2MQTT
- A USB Zigbee coordinator
- A Zigbee smart plug as the first test device
For my setup, I used a coordinator based on the CC2652P Zigbee chip.
What You Need
To follow this guide, you’ll need:
- A Home Assistant OS device
- A Zigbee USB coordinator
- Mosquitto broker installed in Home Assistant
- Zigbee2MQTT installed in Home Assistant
- At least one Zigbee device to pair
For the first test device, I used a Zigbee smart plug with power monitoring.
Do not set up the same coordinator in both ZHA and Zigbee2MQTT. Only one integration can use the USB coordinator at a time. If Home Assistant auto-discovers it for ZHA, ignore that prompt if you plan to use Zigbee2MQTT.
Step 1: Plug in the Zigbee Coordinator
If HAOS is running inside Proxmox, the USB coordinator needs to be passed through to the VM first.
Start by plugging the Zigbee coordinator into your Home Assistant device.
I plugged mine directly into the device, but if you have a short USB extension cable, it is worth using one.
A USB extension cable helps move the coordinator away from the computer, USB ports, SSDs, and other possible sources of interference.
This can help improve Zigbee reliability, especially if your Home Assistant device has a lot of other hardware connected nearby.
Zigbee 3.0 USB Dongle
A Zigbee2MQTT-compatible USB coordinator for adding Zigbee devices to Home Assistant.
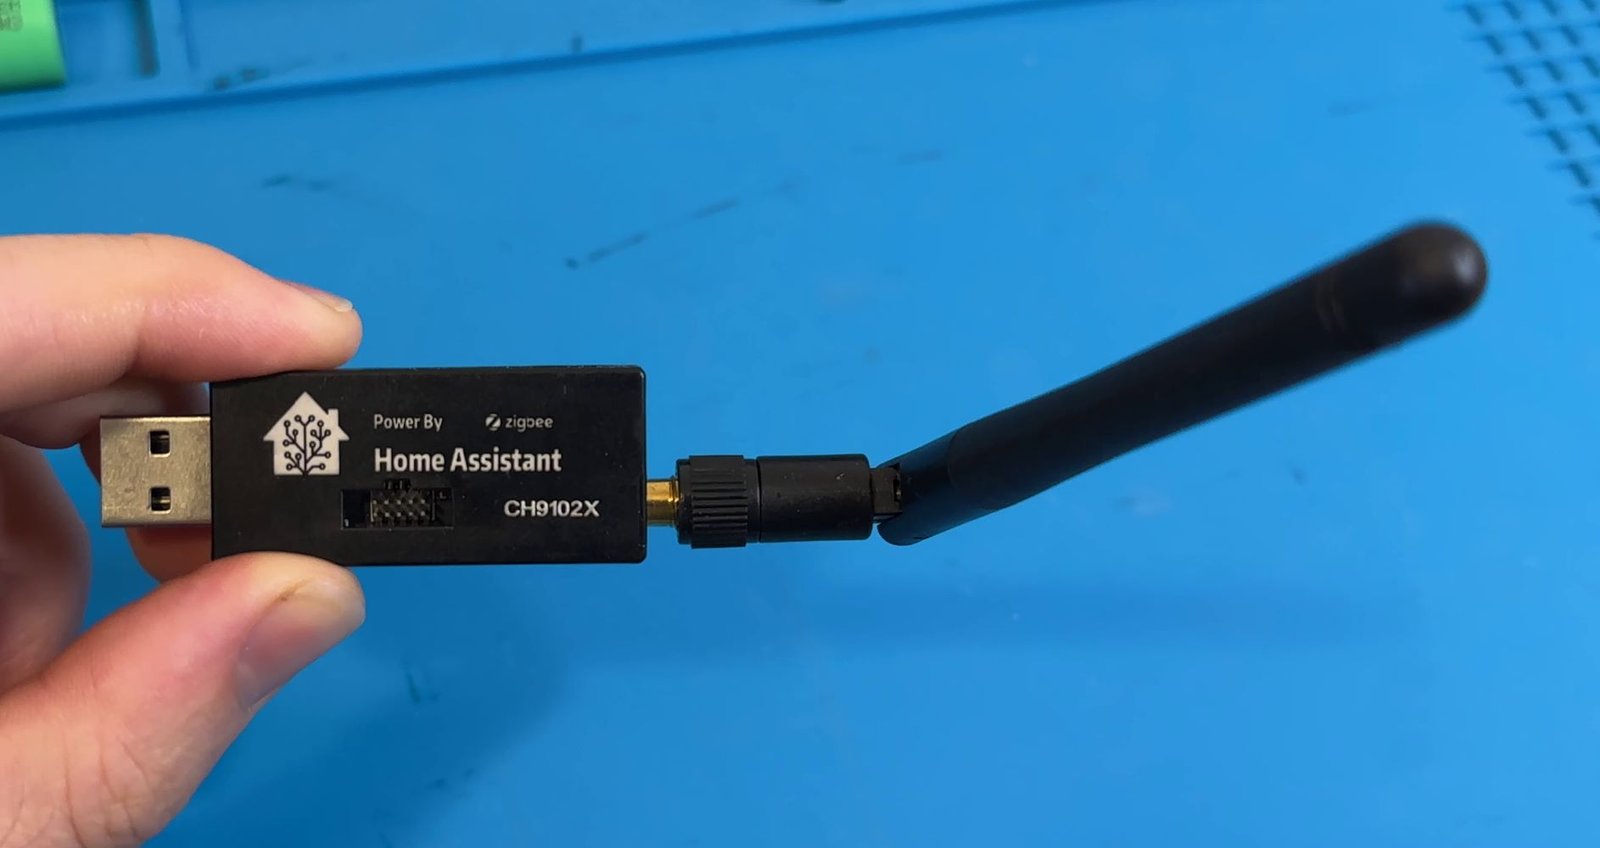
For this setup, I used a CC2652P-based Zigbee coordinator USB dongle with an external antenna. Your coordinator does not need to use this exact chip, but it should be a Zigbee2MQTT-supported coordinator with the correct coordinator firmware installed.
Step 2: Find the Coordinator Serial Path
Next, you need to find the serial path for the coordinator.
In Home Assistant, go to:
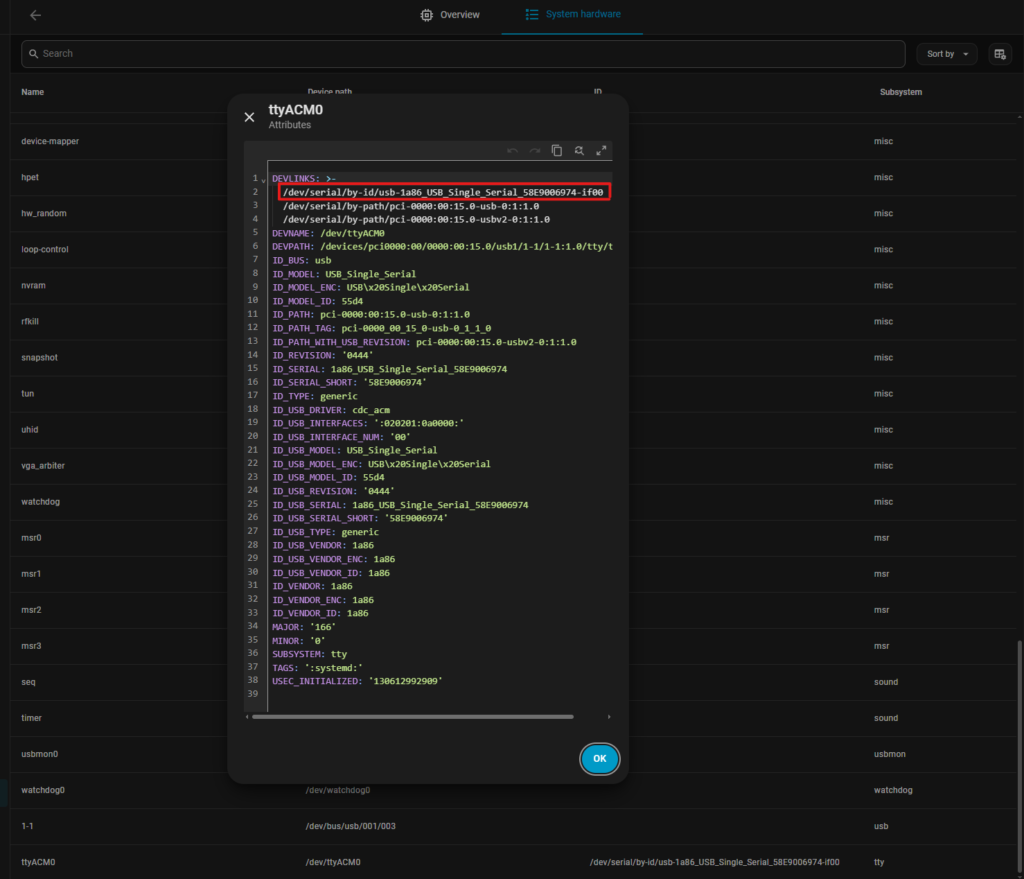
Settings → System → Hardware → System hardware
Look for the USB serial device.
Your coordinator may show up as something like:
/dev/ttyACM0However, it is better to use the longer by-id path.
The ttyACM0 path can change after a reboot. The by-id path is more stable and is the better option to use in Zigbee2MQTT.
The path may look something like this:
/dev/serial/by-id/usb-1a86_USB_Single_Serial_58E9006974-if00Copy the full path.
You will need it when configuring Zigbee2MQTT.
Step 3: Install and Start Mosquitto Broker
Zigbee2MQTT uses MQTT to send Zigbee device data into Home Assistant.
Because of that, you need an MQTT broker running first.
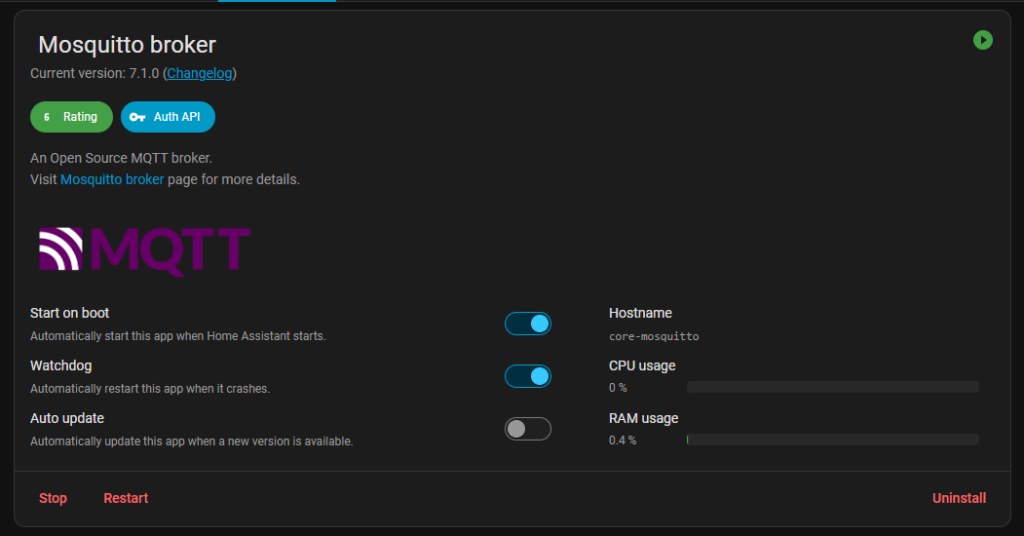
In Home Assistant, install the Mosquitto broker add-on if it is not already installed.
Go to:
Settings → Apps → Install App
Search for Mosquitto broker.
Install it, then start the add-on.
It is also worth enabling:
- Start on boot
- Watchdog
This helps make sure the MQTT broker starts automatically if Home Assistant restarts.
Step 4: Create a Dedicated Zigbee2MQTT User
It is a good idea to create a dedicated Home Assistant user for Zigbee2MQTT.
This user is what Zigbee2MQTT will use to connect to the Mosquitto broker.
For example, you could create a user called zigbee2mqtt.
Go to:
Settings → People → Users
Create a new user and set a password. You do not need to create a Person for it.
Keep the username and password handy, because you will need them in the Zigbee2MQTT configuration.
Step 5: Install Zigbee2MQTT
Next, install Zigbee2MQTT.
In Home Assistant, go to:
Settings → Apps → Install App
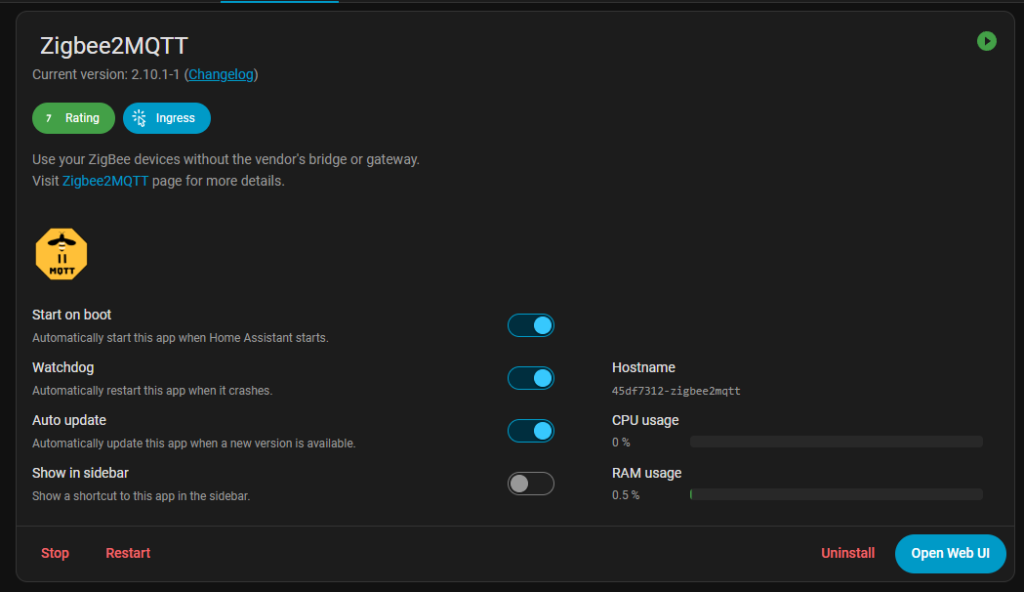
Search for Zigbee2MQTT.
Install it.
Once it is installed, open the Zigbee2MQTT app configuration.
Before starting it, enter the MQTT and serial settings in the app configuration.
Step 6: Configure MQTT in Zigbee2MQTT
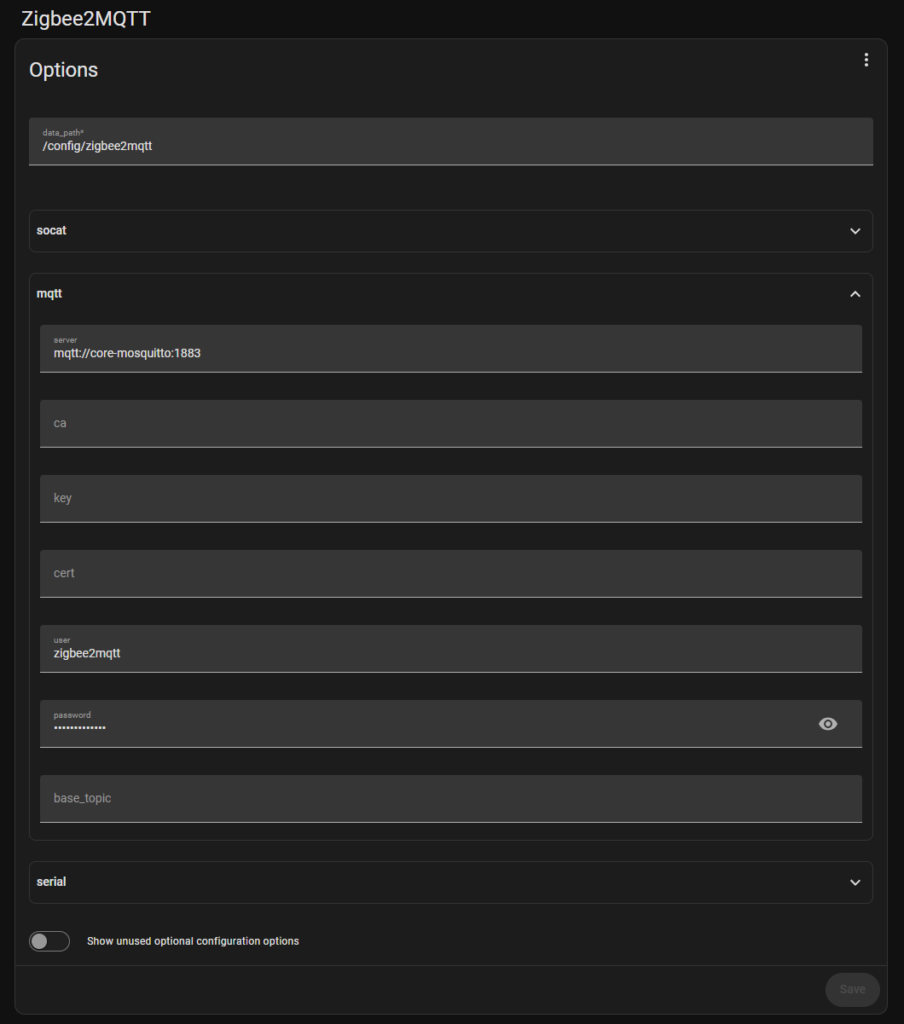
In the MQTT section, enter the Mosquitto broker address, the Zigbee2MQTT username, and the password for that user.
The MQTT section should look like this:
mqtt:
  server: mqtt://core-mosquitto:1883
  user: zigbee2mqtt
  password: YOUR_PASSWORD
Replace:
YOUR_PASSWORDwith the password you created for the Zigbee2MQTT user.
The server address:
mqtt://core-mosquitto:1883is the internal address used by Home Assistant add-ons to communicate with the Mosquitto broker.
Step 7: Configure the Serial Port
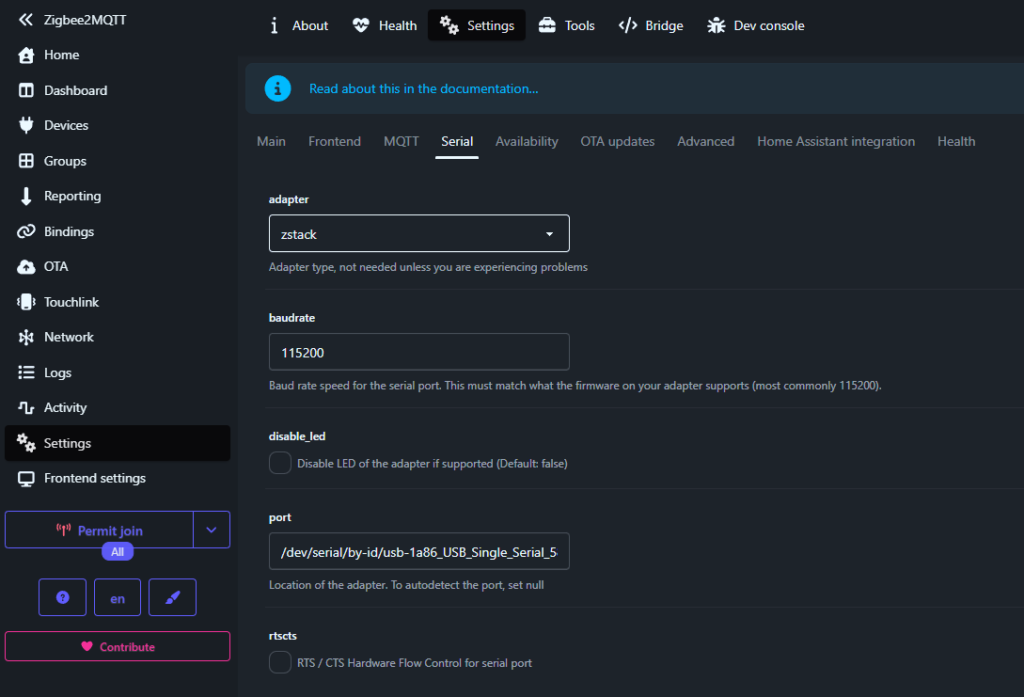
Next, set the serial port.
This is where you paste the by-id path you copied earlier.
For example:
serial:
  port: /dev/serial/by-id/usb-1a86_USB_Single_Serial_58E9006974-if00
  adapter: zstack
For a CC2652P coordinator, the adapter type should be:
zstackSo if your coordinator is based on a CC2652P chip, your serial section should use:
adapter: zstackMake sure you use your own serial path.
Do not copy mine unless your device path is exactly the same.
Step 8: Start Zigbee2MQTT and Open the Web Interface
Once the MQTT and serial settings are saved, start the Zigbee2MQTT app.
Then open the Zigbee2MQTT web interface from the app page by selecting Open Web UI.
That is the normal way to access it with the Home Assistant add-on. Zigbee2MQTT uses Home Assistant Ingress, so you do not need to expose a separate port just to open the web interface.
The frontend still uses port 8099 inside the add-on, but a direct address such as http://homeassistant.local:8099 will only work if you have deliberately exposed that port in the app’s network settings.
If this is the first time Zigbee2MQTT has been started, you may be taken through the onboarding or setup page.
Because the MQTT and serial settings were already entered in the app configuration, check that the onboarding page has picked up the correct details.
The important things to confirm are:
MQTT server: mqtt://core-mosquitto:1883
Serial port: your /dev/serial/by-id/ path
Adapter type: zstack
For a CC2652P coordinator, the adapter type should be zstack.
Step 9: Check the Remaining Zigbee2MQTT Settings
After Zigbee2MQTT has started, you can check the remaining settings.
The main ones to confirm are the frontend, Home Assistant discovery, and Zigbee channel settings. These may be easier to check after Zigbee2MQTT has started for the first time.
The frontend setting enables the Zigbee2MQTT web interface.
In my setup, the frontend itself was using port 8099 inside the add-on.
frontend:
  enabled: true
  port: 8099
Home Assistant discovery should also be enabled.
homeassistant:
  enabled: true
This allows Zigbee2MQTT devices to appear in Home Assistant automatically through MQTT discovery.
Once a Zigbee device is paired in Zigbee2MQTT, it should show up in Home Assistant without needing to manually create entities.
For the Zigbee channel, I left mine on the default channel, which was channel 11.
advanced:
  channel: 11
It is best to choose your Zigbee channel before pairing devices.
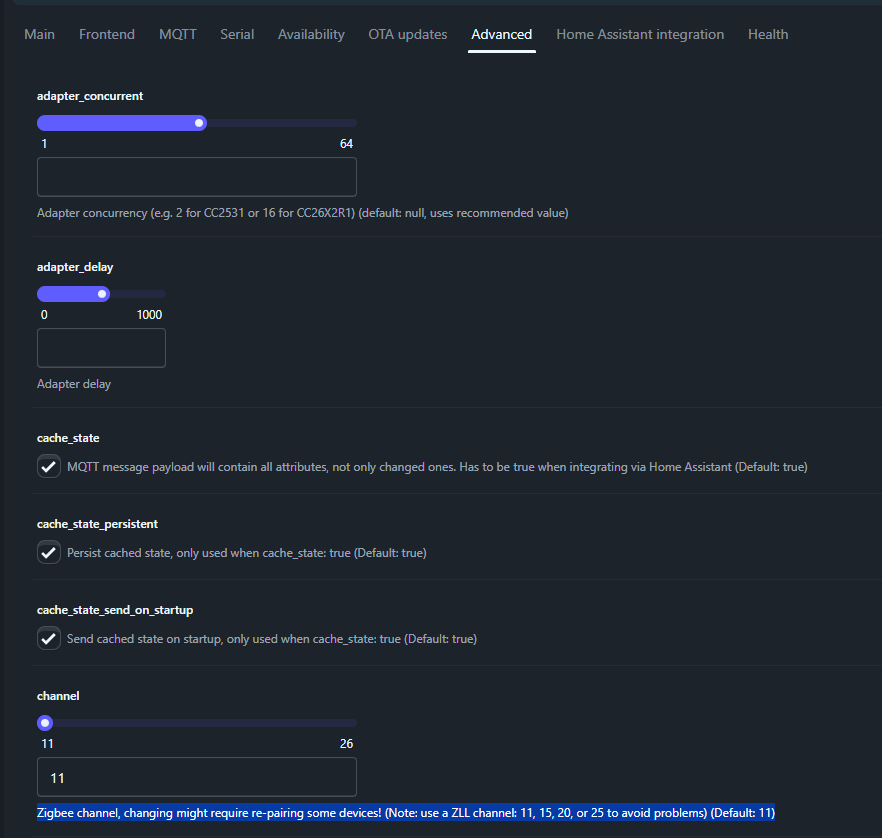
Changing the Zigbee channel later can mean devices need to be paired again.
For a beginner setup, leaving the default is fine if everything works.
Step 10: Restart Zigbee2MQTT After Config Changes
If you change the Zigbee2MQTT configuration, save the changes and restart the Zigbee2MQTT app.
Then open the logs and check that it starts correctly.
Once Zigbee2MQTT is running, open the web interface again and continue with pairing your first Zigbee device.
Step 11: Pair Your First Zigbee Device
Once Zigbee2MQTT is open, turn on Permit join.
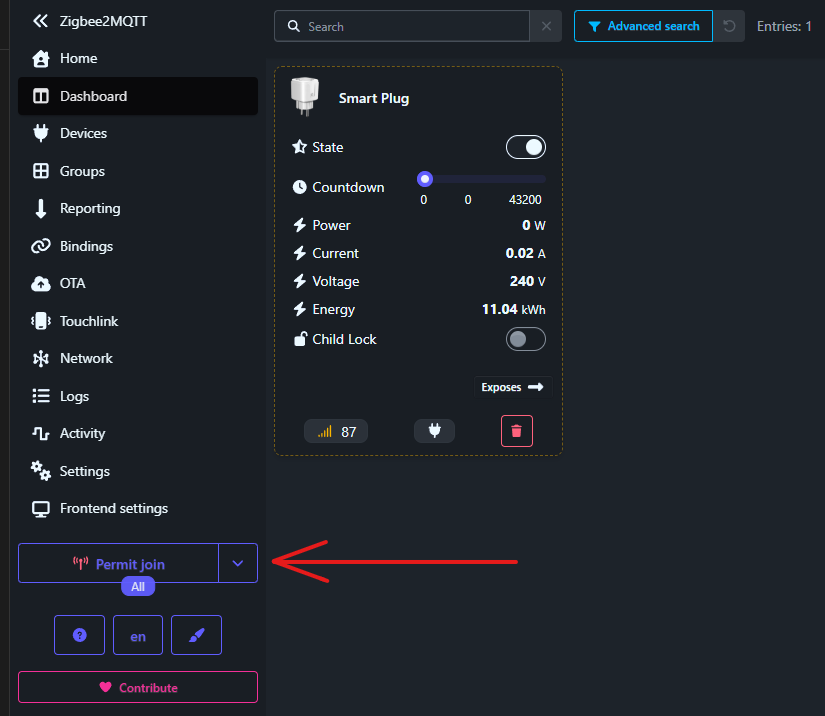
This allows new Zigbee devices to join the network.
Then put your Zigbee device into pairing mode.
For my smart plug, I had to hold the power button for around five seconds until the green LED started flashing.
Keep the device close to the coordinator for the first pairing.
This helps make the initial pairing process more reliable.
Once the device is found, it should appear in Zigbee2MQTT.
Step 12: Rename the Device
After the device appears in Zigbee2MQTT, give it a clear name.
For this example, I used Smart Plug.
That works, but it is usually better to be more detailed.
For example, Office Smart Plug or Kitchen Motion Sensor.
Clear names make your setup much easier to manage later, especially once you have more Zigbee devices.
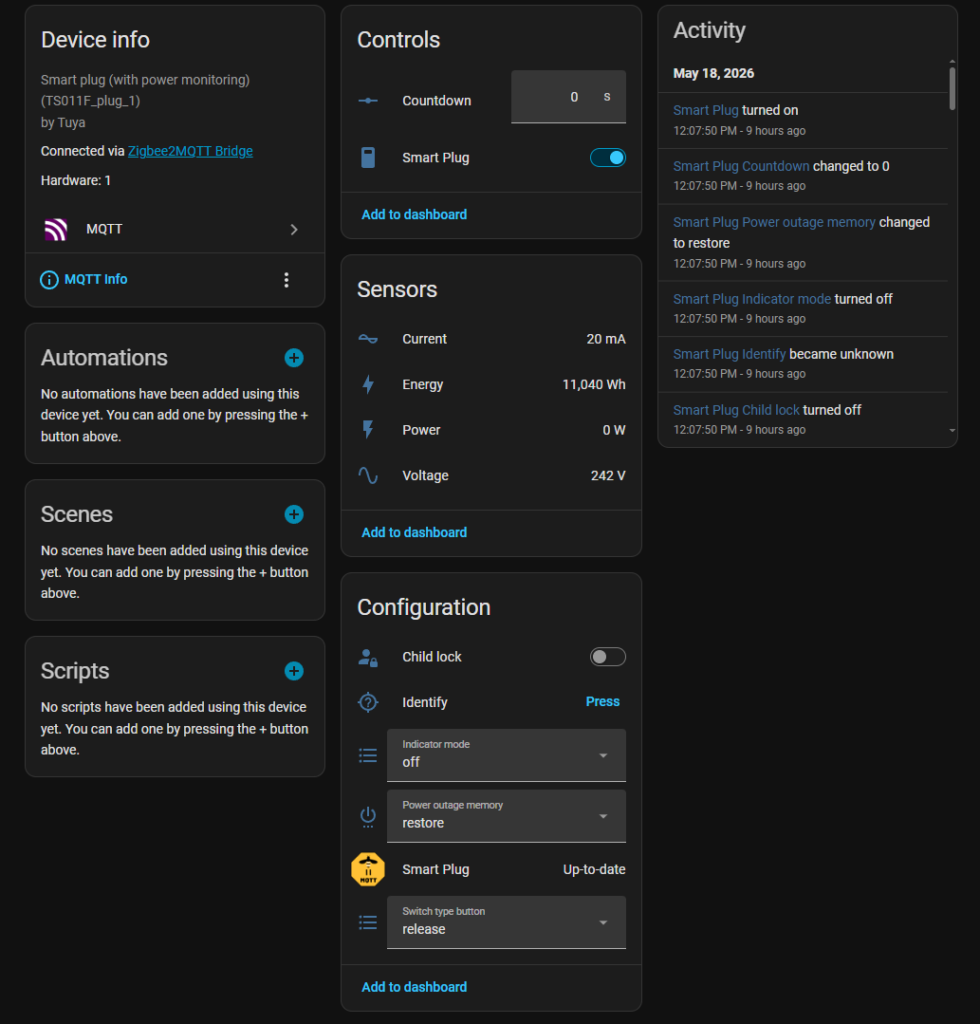
Step 13: Check the Device in Home Assistant
After the device is added in Zigbee2MQTT, it should also appear in Home Assistant through MQTT discovery.
Go to Home Assistant and check your devices and entities.
You should see the Zigbee device appear automatically.
You should also see the exposed sensors from that device.
In my case, the smart plug supports power monitoring, so Home Assistant can show extra details like:
- Switch state
- Power usage
- Energy usage
- Voltage
- Current
- Link quality
This is one of the nice things about using Zigbee2MQTT.
You can often see more detail about the device than just a simple on/off switch.
What If Zigbee2MQTT Does Not Start?
If Zigbee2MQTT does not start, the first thing to check is the log page.
Common issues include:
Wrong Serial Path
Make sure you are using the full /dev/serial/by-id/ path.
Avoid using /dev/ttyACM0 or /dev/ttyUSB0 unless you are only testing.
The by-id path is more reliable.
Wrong Adapter Type
For a CC2652P coordinator, use adapter: zstack
If the adapter type is wrong, Zigbee2MQTT may not be able to communicate with the coordinator.
MQTT Login Issue
Make sure the MQTT username and password are correct.
The user must exist in Home Assistant, and the password must match the one in your Zigbee2MQTT configuration.
Coordinator Already in Use
If Home Assistant can see the USB coordinator but Zigbee2MQTT says it cannot open the port, check that ZHA or another add-on is not already using it. A coordinator can only be opened by one Zigbee stack at a time.
Coordinator Firmware Issue
Most Zigbee coordinators sold as coordinators should come with firmware already installed.
I would not flash firmware straight away.
First, try the normal setup.
If Zigbee2MQTT can see the serial device but cannot communicate with the Zigbee radio, then firmware may be something to investigate.
Errors like adapter connection failures or timeouts can point in that direction.
Disclaimer: This project is shared for educational purposes only. If you choose to build it, you do so at your own risk. Double-check wiring, follow safety guidelines, and never work on live circuits if you’re unsure.
Some of the links in this post may be affiliate links. If you buy through them, I may earn a small commission at no extra cost to you.