
If you’re new to IoT, it’s easy to get stuck in the “what should I build first?” loop.
The best beginner projects have a few things in common: they solve a real problem, they don’t require complex wiring, and you get a result quickly (a dashboard, an alert, or something in your home that works better than it did yesterday).
Below are 10 IoT projects for beginners that are practical, satisfying, and great for learning the basics. Each one includes what it does, why it’s beginner-friendly, what you’ll need (as a list you can add affiliate links to), and upgrade ideas if you want to take it further.
A beginner-friendly parts kit
If you want to keep your first builds smooth, a simple starter kit goes a long way.
Starter hardware that gets reused across multiple projects:
- ESP32 dev boards (2–3 boards is ideal)
- Jumper wires (male-male + male-female)
- Breadboard
- Assorted resistors (basic kit)
- Heatshrink + small wire kit
- Small plastic enclosures
- USB cables / 5V power supplies
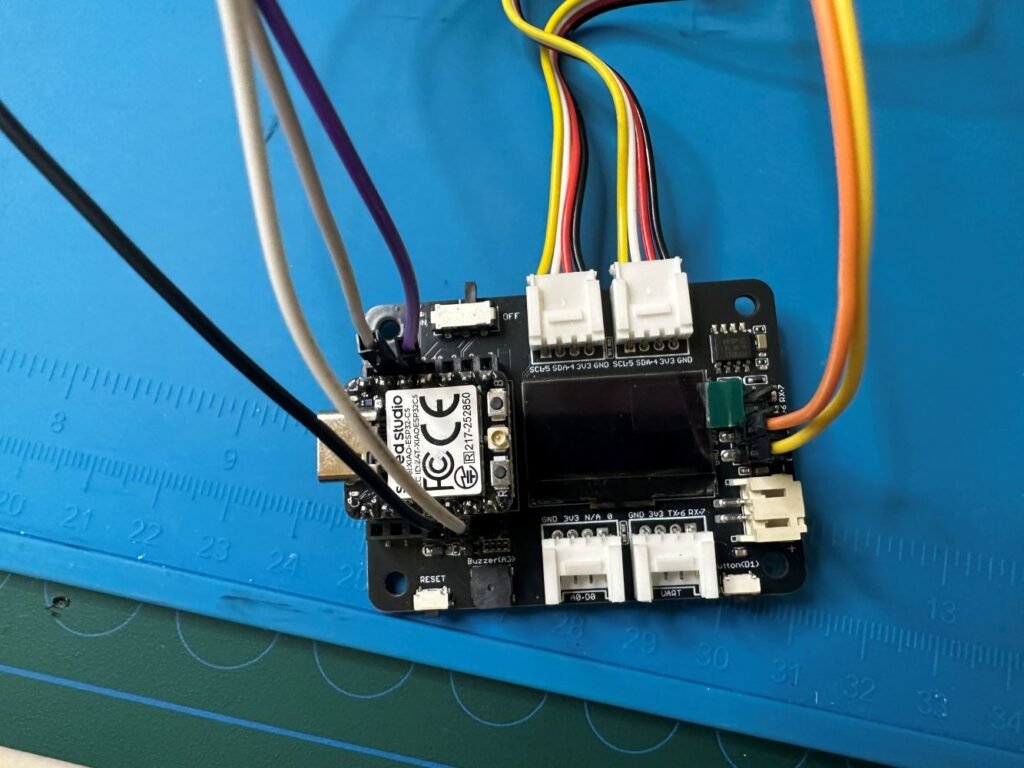
1) Air quality monitor (CO2 + PM2.5 + VOC)
What it does: Measures indoor air quality and tells you when it’s time to ventilate.
An air quality monitor is one of the best beginner projects because the data is genuinely useful. CO2 levels can rise faster than most people expect, especially in bedrooms overnight or closed rooms during the day. Once you can see the readings, you’ll quickly learn when your home needs fresh air. It’s also a great project if you like dashboards, because the graphs clearly show when people enter a room, when windows open, and when ventilation improves the air.
What you need:
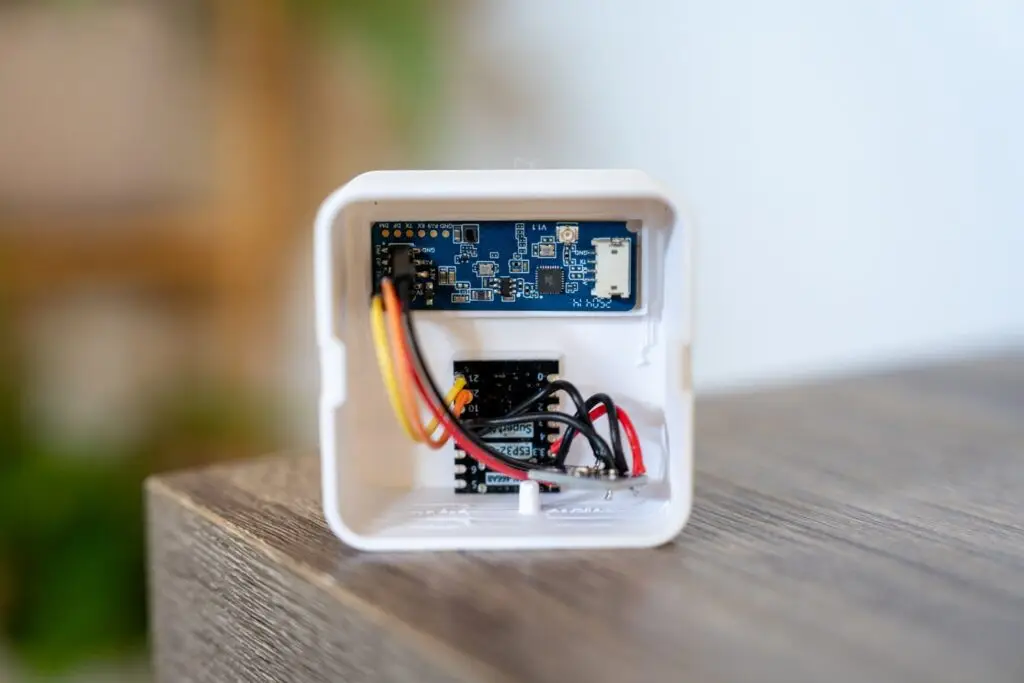
- Microcontroller (ESP32-C3)
- CO2 sensor (NDIR type recommended for proper CO2 readings)
- Grove Laser PM2.5 Sensor (measures PM1.0, PM2.5, and PM10)
- Optional: VOC sensor (for general air quality trends)
- Jumper wires
- Power supply / USB cable
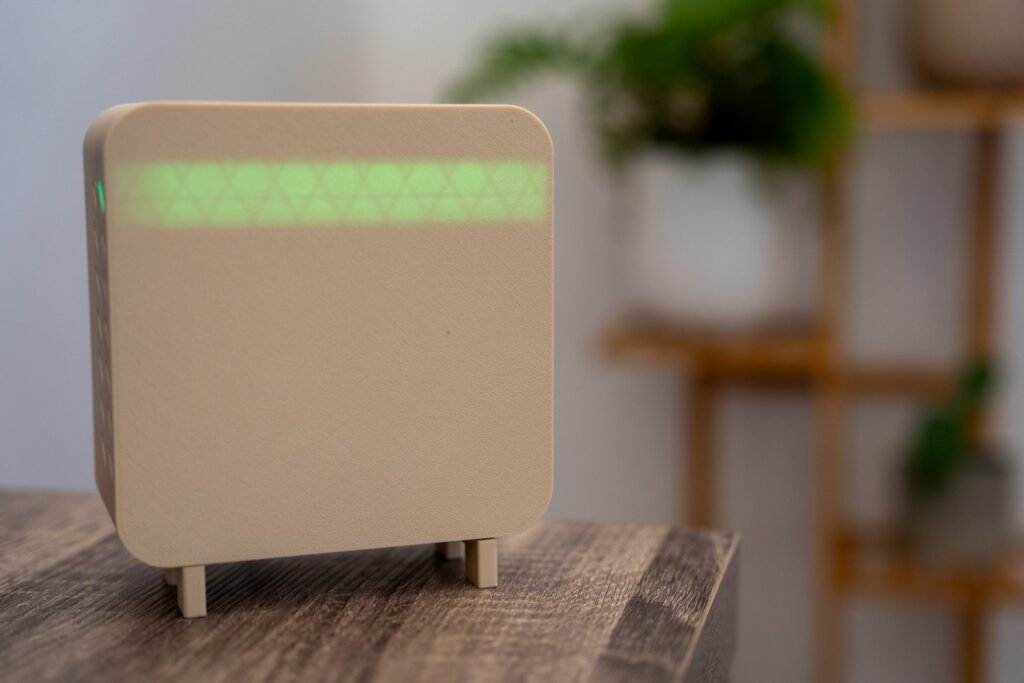
- Optional: OLED display (so it works without a phone)
- Optional: enclosure (especially if you want it to look clean)
Upgrade ideas:
- Turn on a fan when CO2 rises above your threshold
- Overnight bedroom alerts (stale air)
- Trigger an air purifier automatically
- Add an e-ink display for low power
- Add a second sensor in another room to compare patterns
2) Motion-activated lights that feel instant (PIR or mmWave)
What it does: Turns lights on when you enter a space and off when it’s empty.
This is one of the most satisfying beginner projects because you feel it every day. Hallways, bathrooms, laundry rooms, and garages are perfect places to start. A basic PIR sensor is cheap and reliable, while mmWave sensors can detect presence even when you’re sitting still (better for offices and living rooms).
What you need:
- Motion sensor (PIR) or presence sensor (mmWave)
- Smart bulb, smart switch, or smart relay
- Power supply (if your sensor needs one)
- Optional: microcontroller if you’re building the sensor node yourself
Upgrade ideas:
- Only trigger after dark
- Change brightness based on time of day
- Add a shorter “on” time in high-traffic areas
- Use zones/filters (mmWave) to reduce false triggers
3) Smart fan control
What it does: Turns a fan on/off automatically based on temperature (or humidity), with a manual override.
This is a great beginner automation because it’s simple but genuinely improves comfort. Instead of constantly adjusting things yourself, the fan can kick in when a room hits a set temperature and turn off once it cools down. It’s also a good lesson in making automations that still feel normal to live with, where you can override it anytime and it doesn’t fight you.
What you need:
- Temperature + humidity sensor (from project #1, or any equivalent)
- Smart plug (or smart switch) rated for your fan
- Fan (desk/pedestal fan is perfect)
- Optional: microcontroller if your sensor is DIY
Upgrade ideas:
- Different thresholds for day vs night
- Only run when someone is home
- Add a manual “boost” mode for hot days
- Add a timer so it never runs endlessly
XIAO ESP32-C3
A tiny ESP32-C3 board with Wi-Fi, Bluetooth LE, USB-C and battery charging support, making it a great option for compact IoT and ESPHome projects.

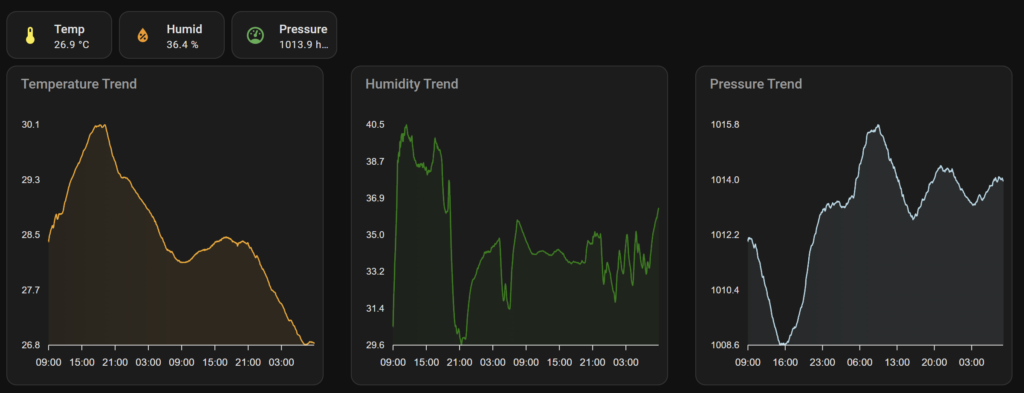
4) Smart temperature + humidity monitor
What it does: Tracks temperature and humidity in a room and shows it on a dashboard. You can also set alerts if a room gets too hot, too cold, or too humid.
A temperature and humidity monitor is one of the quickest “win” projects because it’s useful straight away. You’ll start noticing patterns you didn’t expect, like how much a room changes overnight, how long it takes to cool down after a hot day, or how humidity spikes during showers and cooking. Even if you don’t automate anything yet, logging the data teaches you the basics of sensors, connectivity, and turning readings into something you can actually use.
What you need:
- Microcontroller (ESP32-C3 is the common pick)
- Temperature + humidity sensor (BME280 or SHT31 are popular)
- Jumper wires
- Breadboard (optional, but makes life easier)
- USB cable / power supply
Upgrade ideas:
- Add mould-risk alerts (high humidity for too long)
- Add multiple sensors around the house
- Move it into a small enclosure for a clean install
- Switch to battery + deep sleep for a wireless sensor node
5) Water leak detector under sinks
What it does: Detects water leaks under sinks, behind the fridge, near the hot water system, or in the laundry.
A leak detector is a beginner project that can genuinely prevent expensive damage. Most people don’t notice a small leak until it becomes a bigger problem, especially in places you rarely check. A leak sensor sits quietly in the background and only alerts you when it matters.
What you need:
- Leak sensor (prebuilt is easiest)
- Optional DIY route:
- Microcontroller (ESP32-C3)
- Leak probe / water sensor pads
- Enclosure
- Buzzer (optional)
Upgrade ideas:
- Add a loud local alarm plus phone notifications
- Place multiple sensors around the house
- Add a smart shut-off valve (advanced)
- Track “near misses” if you want trend data (slow leaks)
6) Smart doorbell notifications
What it does: Detects the doorbell press and sends a notification, and can also trigger lights or chimes.
This one feels like a real home upgrade, especially if you don’t have a smart doorbell. The simplest approach is to detect when the button is pressed and trigger a notification or turn on lights. The goal isn’t to rebuild your doorbell system, it’s just to add something useful on top.
What you need:
- Microcontroller (ESP32-C3)
- Safe signal detection method (opto-isolator is common)
- Low voltage wiring accessories (connectors, heatshrink, etc.)
- Enclosure
- Optional: relay module (if you want to trigger another chime/light)
Upgrade ideas:
- Flash porch lights when pressed
- Different behaviour at night vs day
- Add a camera snapshot in the notification (if you already have a camera)
- Add a second chime inside the house
7) Soil moisture monitor
What it does: Measures soil moisture so you can see when plants actually need watering.
Soil moisture is a favourite beginner project because it’s simple, visual, and surprisingly useful. Most people water plants based on habit, not the actual soil moisture. Once you can see the readings over time, you’ll quickly learn what “dry” looks like for your specific plant, pot size, and season.
What you need:
- Microcontroller (ESP32-C3)
- Capacitive soil moisture sensor (avoid resistive probes)
- Jumper wires
- Enclosure (optional)
- Optional: battery + charging module if you want it wireless
Upgrade ideas:
- Battery + deep sleep so it lasts ages
- Add a temperature sensor near the plant
- Alerts if moisture stays low for X days
- Build a simple “plant dashboard” with trends
8) Garage door status + “left open” alerts
What it does: Tells you if your garage door is open or closed, and alerts you if it’s left open too long.
This is an extremely practical project and it’s usually easier than people think. A simple contact sensor can reliably track the door state, which solves the “did I close it?” problem instantly. Once you have that, the automation rules are straightforward: alert if open too long, or only alert when you’re not home.
What you need:
- Contact sensor (prebuilt) or reed switch + magnet
- Optional DIY route:
- Microcontroller (ESP32-C3)
- Mounting bracket / adhesive mounts
- Enclosure
- Optional: second sensor for extra reliability
Upgrade ideas:
- Alert only when you’ve left home
- Notify if it’s left open after X minutes
- Trigger a camera recording when it opens
- Add a status LED near the internal door
9) IR blaster to control “dumb” devices (TV, aircon, heater)
What it does: Controls IR devices through your phone or automations, without replacing the device.
An IR blaster is perfect if you want a big impact with minimal wiring. It can bring older appliances into your setup, which is especially useful for air conditioners, TVs, and heaters. Even if you only use it for basic on/off control, it’s a great learning project and it looks impressive on a dashboard.
What you need:
- Microcontroller (ESP32-C3)
- IR LED + resistor
- Optional: IR receiver (to learn remote codes)
- Power supply
- Enclosure (optional)
Upgrade ideas:
- Temperature-based aircon control
- Schedules that still allow manual override
- Scenes like “movie mode” (lights + TV)
- Add a physical button for quick control
10) Door/window sensor alerts
What it does: Notifies you when a door or window opens, and can trigger a basic “Away mode.”
Door and window sensors are simple hardware, but they unlock a lot of useful ideas. You can start with basic notifications, then build up to rules like “alert only when nobody’s home” or “notify me if the back door opens after 10pm.” It’s a great project for learning how to track state (open vs closed) and use that information in automations.
What you need:
- Door/window contact sensors (prebuilt)
- Optional DIY route:
- Microcontroller (ESP32-C3)
- Reed switch + magnet
- Wires / small terminal block
- Enclosure
Upgrade ideas:
- Add an entry delay (so you can disarm before alerts)
- Turn on lights when a door opens at night
- Log door open/close history
- Add a “holiday mode” for extra alerts
Conclusion
If you’re just getting started, don’t overthink it. Pick one project that solves a real problem in your home, build it, and then improve it once you’ve got the basics working.
A good simple path is:
- Start with #4 (temperature/humidity) to learn sensors and dashboards
- Add #6 or #10 for useful alerts
- Then build something with a “wow factor” like #2 (motion/presence lighting) or #1 (air quality)
Once you’ve built one or two of these, you’ll have the confidence to mix them together (for example: air quality triggers a fan, motion lighting only triggers when someone’s home, garage door open triggers a camera recording).
Some of the links in this post may be affiliate links. If you buy through them, I may earn a small commission at no extra cost to you.


